Kay Wheeler Moore

Welcome to my blog

Hello. . .

The Newfangled Country Gardener is for anyone who has a garden, would like to have a garden, or who simply enjoys eating the garden-fresh way. I don't claim to be an expert; in this blog I'm simply sharing some of the experiences my husband and I have in preparing food that is home-grown.

About the author

Kay Wheeler Moore is the author of a new cookbook, Way Back in the Country Garden, that features six generations of recipes that call for ingredients that are fresh from the garden. With home gardening surging in popularity as frugal people become more resourceful, this recipe collection and the stories that accompany it ideally will inspire others to cook the garden-fresh way and to preserve their own family food stories as well. The stories in this book center around the Three Red-Haired Miller Girls (Kay's mother and aunts) who grew up in Delta County, TX, with their own backyard garden so lavish that they felt as though they were royalty after their Mama wielded her kitchen magic on all that was homegrown. Introduced in Kay's previous book, Way Back in the Country, the lively Miller Girls again draw readers into their growing-up world, in which a stringent economic era--not unlike today's tight times--saw people turn to the earth to put food on the table for their loved ones. The rollicking yarns (all with recipes attached) have love, family, and faith as common denominators and show how food evocatively bonds us to our life experiences.

Tuesday, August 31, 2010

Tomatoes on the fall vines aren't here yet, but store-bought ones make this recipe sing

From the large package of pork chops we bought at the store for yesterday's Pork and Lima Skillet recipe, we had some chops remaining--a good excuse for stirring up a recipe on my remaining summer "short-list" --only a few to go until I can check them all off. Then I can shelve in my "summer" recipe binder and replace it on the counter with my fall one. Apples, pumpkins, acorn squash--just around the bend!

But still in the "summer" category is this recipe for Skillet Pork Chops and Tomato Beans. The addition of fresh tomatoes (we're all out of our homegrown ones right now, but from my back porch I can see Hubby's fall tomato plants starting to look promising) plus generous helpings of onion and celery really make this recipe sing.

The original recipe called for canned pork and beans, but thinking of the sugar and sodium content of that ingredient was a turn-off. Instead I bought a can of cannellini beans (white navy beans) and rinsed them thoroughly to make them much more compliant with a sodium-reduced diet. Thank you, Splenda, for introducing a brown-sugar substitute product to make adding brown sugar less guilt-inducing. The slightly sweet taste that this added just made the recipe. We rarely eat pork chops, so to have these two skillet dishes (Pork and Lima Skillet and Skillet Pork Chops and Tomato Beans) two nights in a row was a refreshing switch for us from our usual chicken or fish, chicken or fish, chicken or fish, which can get boring.

The students are back in school, the fall decorations are out in the stores, Friday-night football is on the horizon. No question about where this year is headed. But for the last few days of August and the remaining summer recipe wish list, we'll enjoy you to the hilt.


Skillet Pork Chops and Tomato Beans

1 tablespoon olive oil
4 boneless pork chops, trimmed
3/4 cup each chopped onion and celery
1 (14-ounce) can cannellini beans, drained and rinsed thoroughly
3 teaspoons packed brown sugar (I use brown-sugar substitute)
2 medium tomatoes, chopped

Heat olive oil in skillet over medium heat for 1 minute. Cook chops 10 minutes or until browned. Set aside. Into drippings in skillet add onion and celery and cook until tender. Add tomatoes, beans, and brown sugar. Heat to a boil. Return chops to pan. Cover and cook over low heat 5-10 minutes or until done. Serves 4.


Monday, August 30, 2010

Lima-bean and pork skillet remembered for special occasion on which it was served four decades ago

Some meals evaporate from the memory as quickly as they're prepared; others linger in one's thoughts forever.

The latter was true for the first meal I ever fixed for my parents after Hubby and I were wed 41 years ago today. After we said our "I-do"s, we blitzed out of the church parking lot in Texas and headed for our new home in Kentucky. Long months would go by before we would lay eyes on loved ones again. For my parents to travel to Kentucky to visit us in our newlywed apartment was a true red-letter day indeed.

Armed with my Betty Crocker's New Dinner for Two cookbook that was my lifesaver in those first months as a new bride and inexperienced cook, I selected what I believed was just the right meal to serve my parents for the first dinner of their visit. I didn't even consider whether they liked pork chops; in fact, I don't recall my mother ever preparing them as I was growing up. Perhaps she did and I had forgotten, but for me my parents' preferences really didn't count as much as did my proficiency at this one dish. It represented one thing I, as a novice, had mastered on the stove, so Pork and Lima Skillet it would be.

Pork and Lima Skillet was colorful, healthy, and kind of a no-brainer (I really couldn't mess it up much). The limas were frozen, but the recipe would be a wonderful use of limas from the garden for gardeners who like to grow them (hopefully this will be us next year). My parents, bless their hearts, were full of praise for their daughter's fledgling culinary efforts. All these years the recipe has been a favorite and now bears a place of honor in my new cookbook, Way Back in the Country Garden, in the chapter entitled "Little Dusty and the Missing Wedding Dress".

Also, a special thank-you to my hubby for bearing with me while I struggled to learn to cook and for being the always-affirming guinea pig for my recipe try-outs (some great and some not-so much) for 41 years. Happy anniversary!


Pork and Lima Skillet

3 1/2 cups fresh (or 2 10-ounce packages frozen) lima beans
5 or 6 smoked pork loin chops
1 teaspoon chicken-flavored gravy base
1 tablespoon all-purpose flour
1/2 teaspoon dried basil, crushed
3/4 cup water

Cook limas in boiling water until they are tender. If you are using frozen limas, cook according to package directions. Omit salt in cooking water; drain. In skillet brown chops over medium heat. Remove chops from skillet. Pour off all but 1 tablespoon drippings. To skillet add gravy base. Blend in flour and basil. Add 3/4 cup water; cook and stir over medium heat until sauce is thickened and bubbly. Add limas to skillet; stir to coat with sauce. Arrange chops over limas. Cover and cook over low heat about 5 minutes or until mixture is heated through. Serves 5 or 6.

Friday, August 27, 2010

Visions of backyard apple trees accompanied taste-testing of this grandparental recipe

When I see that something is rated the best of the best among grandparental cooks, I take notice.

Grandparents.com, one of my favorite websites, asked grandparents to submit their favorite breakfast creations and to have their recipes judged for top prizes.

Knowing how much I like to plan for and cook creatively for my little grandperson when she's around, I could only imagine what kind of special items were rounded up for that competition. After the top cooks were cited, I wanted to try out the winning entry in each category.

The top prize, German French Toast with Applesauce, sounded absolutely outtasight. The originator wrote that her friends told her she made the best French toast around. I'm a French toast-lover from the word "go" and always am looking for new ways to prepare it. I'd love to have a reputation for being the Grand Pooh-Bah of French-Toast Making.

The applesauce I used in preparing the recipe was from the grocery aisle, but I remembered a few years back being given a jar of homemade applesauce from a family member's own backyard apple trees. What a wonderful thing that would be--homemade applesauce to accompany an already dynamite dish!

Hubby and I ended up agreeing with the judges in the competition--this grandparental entry was a superlative. We enjoyed it for a Saturday-morning breakfast and had leftovers to enjoy on Sunday morning before church. Got both days off to a great start--and prompted us to dream dreams of adding an apple tree to grow among our peach, plum, and pear trees that we enjoyed so much this year.

German French Toast with Applesauce

Vegetable oil
3 eggs (I used egg substitute)
1/2 cup milk (I used skim milk)
1 teaspoon vanilla extract
1/2 teaspoon plus 1 dash cinnamon, divided
dash salt
3 tablespons sugar (I used sugar substitute)
8 slices whole-wheat bread
1 (8-ounce) jar sugar-free applesauce
sugar-free pancake syrup
butter

Place about 1/2 inch oil in large skillet over medium heat. In a small bowl whisk eggs, milk, vanilla, dash cinnamon, and salt until well blended. Mix together the remaining cinnamon and sugar. Set aside. Dip each roll or slice of bread in egg mixture; turn over and dip again. The bread needs to be very moist but not so much that it will fall apart before it gets to the skillet. Cook until bread starts to brown. Turn over to brown the other side. Pour applesauce (onto pan) around slices and sprinkle with cannamon and sugar mixture. Lower heat if necessary while you stir the applesauce to warm. Serve the French toast topped with warm applesauce and butter and sugar-free syrup

Breakfast Favorites Recipe Contest sponsored by Grandparents.com Winning cook said she got it from a woman in Germany.


Thursday, August 26, 2010

Even without fresh herbs (a next-year wish, once again), these rosemary-spiced potatoes are memorable

Also on our garden "bucket" list for next summer is a great desire to grow more fresh herbs. So far, mint is the only one we've had success with--to much success, in fact, as a previous Newfangled Country Gardener column reported.

I wish I could report that the rosemary contained in this delicious potato recipe was snipped right from the "herb bed" near the back door. (Hopefully next summer it will be.)

It was poured from a spice jar instead.

But even with dried instead of fresh rosemary used to spice up these potatoes, the outcome was flavorful and terrific. I'm always looking for different and unusual ways to cook spuds. This recipe was furnished by a Kroger circular and was totally wonderful.

What's more, I didn't wreck a cookie sheet in the process this time as I did with the Roasted Potato Medley recipe of a few days back. I used a glass baking dish; the olive oil that the potatoes soaked in before they were cooked was adequate to keep anything from sticking to the bottom.


Oven-Roasted Rosemary Potatoes

5 pounds new potatoes
1/4 cup fresh rosemary, chopped
1 cup olive oil
1/4 cup garlic, chopped
salt and pepper, to taste

Cut potatoes into 1/2-inch wedges. Toss with all other ingredients. Roast in 350-degree oven for 45 minutes until potatoes are golden brown and fork tender. Refrigerate any leftovers. Serves 6 to 8.

Wednesday, August 25, 2010

A luscious, berry-laden dessert that's good for you and that incites dreams of next-year's garden

These days everyone's drawing up his or her "bucket list". Mine is more of a "next-summer list." "Next year in Jerusalem" (the well-known phrase that's recited at the end of a Passover Seder) for me is "next year in the garden".

Hubby and I already are envisioning our next-year's crop--and on that list go some new berry vines we'd like to try to plant. One of those involves "something to replace those grapes", as hubby says with a hint of disgust. (I think this means he's over them.) For the past several years our grapevines have been a disappointment--huge and showy but with fruit that has seeds, is tasteless and over which we have to do constant battle with the birds.

Hubby is of a mind to pull out all the grape vines and replace them with a berry patch--blackberries or raspberries--and give that a try.

Yesterday's dessert, Banana Raspberry Rice Pudding, was full of some delicious raspberries--the kind we hope we're growing this time next year. The recipe from Prevention magazine was billed, in essence, "sometimes things that taste delicious and are beautiful also may be good for you at the same time."

This certainly was. It contained fiber-rich brown rice, potassium-filled bananas, and raspberries to die for. All this had creamy banana pudding (sugar-free, of course) wrapped around it. On top was a lavish blob of sugar-free whipped cream. Truly good to look at and good for you! The raspberries gave the "tart" element in the "tart-sweet" mixture and was such a terrific dessert, one truly forgot that consuming this dish was like eating health.

Although we obtained our raspberries from the produce department of our local grocery store, we can dream dreams of the day when they're as close to us simply walking out our back door.


Banana Raspberry Rice Pudding

1 package instant banana pudding mix
2 cups skim milk
1/2 teaspoon vanilla extract
2 cups cooked brown rice
2 medium banana, sliced thinly
2 cups fresh raspberries
sugar-free whipped topping

In a medium bowl combine pudding mix, milk and vanilla. Using a wire whisk mix well. Fold in rice and bananas. Spoon into eight dessert dishes. Chill 2 hours. To serve top with crushed raspberries and two tablespoons full of sugar-free whipped topping. Serves 8 (about 1 cup per serving).


Tuesday, August 24, 2010

Roasted potato dish evokes memories of long-ago campfire cooking

It was part of my hubby's trousseau--a skillet-potato dish that he brought into the marriage with him. I learned to love it because of his mantra, "Love me; love my potatoes."

Actually the skillet-potato dish was something that usually was cooked on the grill at his family's campouts. Since I had never been on a campout until I married Hubby, this was certainly not something in my radar screen. It featured cut-up potatoes and onions and "a little bit of outdoor dirt", the joke always was, to make it taste like something cooked around campfire should taste.

This new recipe, which took the last of our garden tomatoes, was all about the indoors (although I imagine it could be adapted to an outdoor cookstove as well). Furnished by my handy booklet, "Celebrating a Healthy Harvest" by the Chickasaw Nation Nutrition Services, it was designed to be oven-cooked on a cookie sheet (be sure to oil the cookie sheet well or line the sheet with foil and then spray it. I managed to lose a cookie sheet in preparing this because I had not prepared the sheet properly; the food baked on so severely that it wouldn't scrub off during cleanup.)

"Roasted Potato Medley" featured a mixture of potatoes, onions, tomato, carrots, and zucchini. Other than chopping up the vegetables, this has effortless prep and yields beautiful, colorful, healthy results.


Roasted Potato Medley

2 medium red potatoes
1 large onion
1 large tomato
1 large zucchini
2 carrots
2 garlic cloves, minced
1 cup salt-free tomato sauce
2 tablespoons olive oil

Preheat oven to 425 degrees. Use spray oil to generously grease cookie sheet. Wash all vegetables; cut them into 1-inch pieces. In a large bowl combine vegetables. Combine garlic, tomato sauce, and oil. Pour over vegetables; toss to coat. Spread vegetables in a single layer on a cookie sheet. Bake for 1 hour or until potatoes are tender. Turn once during baking. Makes 4 servings.


Monday, August 23, 2010

Braving the stickiest of the sticky trips to the okra patch worth it for fresh, golden-fried batch

Around the table at the family gathering last weekend, the hot topic (and I do mean hot!) among those who had gardens was about picking okra--how on these scorcheroo days nobody can bear the thought of that necessary task.

Even the most seasoned gardeners were quietly admitting that they let days go by now without making a trek to their garden's okra "bushes". The sticky plants get even stickier in this Texas heat. Nobody can bear the thought of sweltering while getting attacked by thousands of little okra-skin prickles.

Miss a day now, and the okra pods are just too big and tough. But doggone it, that's what we've--and everyone else apparently has--been doing. The heat is just too stifling. The gargantuan okra pods have become rejects (a.k.a. gone into the pod-drying pile for seeds for next year.)

Tonight my guilty conscience--and my desire for just one more helping of summer staple Golden Fried Okra--got to me. Hubby answered my pitiful entreaty and dashed out to the okra rows, quickly cut what he could, threw the bigger ones into his "seed pile",and raced back in to take a birdbath and guzzle down some bottled water after the venture. The 20 pods he brought in were perfect for my eggwash and flour-cornmeal dusting before I popped them into a sizzling skillet.

I'm not promising what tomorrow might bring. With yet another 100-plus August day in store, we may become okra slackers again. But on tonight's dinner table was the freshest, goldenest fried okra you can imagine--worth every bit of trouble (Hubby to wife: "That's easy for you to say, since you weren't the picker!")


Golden Fried Okra

20 okra pods, washed and cut into 1/2-inch pieces
1 cup all-purpose flour
1 cup cornmeal
1 teaspoon salt (I used salt substitute)
1/2 teaspoon black pepper
1/4 teaspoon paprika
2 eggs, beaten (I used egg substitute)
olive oil

In medium-sized bowl beat eggs or pour egg substitute. In plastic zipper bag combine flour, cornmeal, salt, pepper, and paprika. Stir cut okra into egg until it is covered. Remove okra from egg and dip in flour mixture in the plastic bag until okra is thoroughly coated. Heat 1-inch oil in a large skillet. When oil is heated, remove coated okra to skillet. Fry in small batches until coating is golden brown and okra tender (about 5-7 minutes). Continue to fry in batches until all okra is fried. Drain on paper towels.


Friday, August 20, 2010

Red-bell pepper plant amazed us and inspired this Veggie Pasta Primavera

Many times we'd recommended it to others but never practiced what we preached.

This year, however, Hubby decided to try container gardening for himself. He planted a red-bell pepper plant in a clay pot and set the pot in the flower bed near the deck.

It started out looking so fragile, one never could imagine the stalk being able to support a single flower, much less a heavy pepper.

Yet, as time marched on, not one but three peppers took hold--and held on firmly as the plant bulked up to support them.

A dish called Veggie Pasta Primavera in Blue-Cheese Sauce was the recipient of our first-ever container-grown red pepper. What a fitting dish for a celebration! Hubby's comment: "You've outdone yourself again." (He says that after most every meal. My Love Language is verbal affirmation.)

I'm not the one who outdid myself, however. It was the container-grown pepper plant. Hooray for an easy gardening method that worked like a charm.

Chopped red pepper blended with some other standout veggies for this incredible dish (the recipe was contained in a Kroger grocery flyer), which served as a main course for us. Squash, zucchini, tomatoes, and green peppers (the latter also from our garden) all went into a casserole dish along with pasta, some crumbled blue cheese, and seasonings. Thirty-minutes later (at 350 degrees) this breeze of an entree emerged from the oven looking and tasting fabulous. We dined on it as a dinner entree alongside some fresh cantaloupe. A wonderful summer-evening meal!

Next year we may expand the containering, with this effort having been successful.


Veggie Pasta Primavera in Blue-Cheese Sauce

1/2 pound linguine, cooked
1 cup tomatoes, diced
1/2 cup zucchini, diced
1/2 cup yellow squash, diced
1/4 cup red pepper, diced
1/4 cup green pepper, diced
1/4 cup red-wine vinegar
1/4 cup olive oil
1 teaspoon Italian seasoning
4-ounces crumbled blue cheese
Parmesan cheese (sprinkle on top)

Combine all ingredients. Spray casserole dish with nonfat cooking spray. Place mixture in casserole dish. Bake in 350-degree oven for about 30 minutes. Refrigerate any leftovers. Serves 4.


Thursday, August 19, 2010

Some memorable muffins from The Little Pear Tree that Could


We guarded them and hoarded them, but the time arose when we had to part with those last two pears from our serendipitous tree.

Bringing in a pear crop from this newly planted little gem was our most delightful gardening surprise of the summer. We had expected the peaches at last to pour in by the bucketfuls, but we had thought the pears were another year or two in the making.

Not only did we start, some weeks back, spotting pear after pear on its branches, the fruit were amazingly tasty. In an earlier column I mentioned learning to ripen them in a paper bag. The dishes that have been prepared from the pear tree's yield have been fabulous, but now the time arose for the pears' last hurrah.

A wonderful little recipe that I'd clipped from an old Taste of Home magazine brought the solution to how to bake those last pear morsels. The pears were enormous in size, so even though the recipe called for about six medium ones, cutting up the two I had remaining easily produced four cups chopped, peeled, ripe pears that the recipe specified.

The cinnamony kitchen smells that emerged when I prepared those Pecan-Pear Muffins brought in a hint of fall (even as tenaciously as we're trying to hold on to summer) and a reminder that the dishes of this current season ultimately will give way to harvest-themed treats such as baked apples and pumpkin everything.

But in the meantime, thank-yous were in order for the Little Pear Tree That Could, with visions of summer 2011 that might even bring more and more.


Pecan-Pear Muffins

3 cups all-purpose flour
2 cups sugar (I use sugar substitute)
2 teaspoons baking soda
1 teaspoon ground cinnamon
1/2 teaspoon salt (I use salt substitute)
2 eggs (I use egg substitute)
1 cup vegetable oil
1 teaspoon vanilla extract
4 cups chopped peeled ripe pears (about 6 medium)
1 cup chopped pecans

In a large bowl, combine the flour, sugar, baking soda, cinnamon, and salt. In another bowl combine the eggs, oil, and vanilla; stir into dry ingredients just until moistened. Fold in the pears and pecans. Fill paper-lined muffin cups two-thirds full. Bake at 350 degrees for 25-30 minutes or until a toothpick emerges clean. Cool for 5 minutes before you remove from pans to wire racks. Makes about 2 dozen.


Wednesday, August 18, 2010

Beautiful, healthy salmon-fruit salad takes the prize in cardiovascular health-promoting dishes

Never has getting those needed Omega-3's down the hatch been so appealing.

Grilled Salmon-Fruit Salad is the king (or should I say queen, because of its beauty) of healthy presentations when you're in the business downing some salmon that everyone tells us to pile on these days for cardiovascular health.

I found this recipe in a paperback recipe book called "Grilling". Typically I keep this handy little book in our "grandparent" house that we have in suburban Phoenix to enable us to visit our grandpreciouses who live in that Southwest U.S. city. We usually grill outdoors more there than we do here, so that seems to be the best place for this collection of recipes to reside.

Last time there, however, I was so taken by the instructions for Grilled Salmon-Fruit Salad, however, that I just had to photocopy a page from the book and bring it home with me. Only now have I gotten around to trying it out, but wow! What an absolute treat! The description line before the recipe calls it "world-class". I completely agree.

The salmon can be prepared in advance by rubbing it in oil, lime juice, and Cajun seasoning before you grill it.. We used unsalted tortilla chips as the salad base, although the recipe suggests housing it in a crisp tortilla bowl or even wrapping the mixture in a soft tortilla (at another time I'm determined to try the latter.)

Spinach, oranges, strawberries, avocado, mango, and almonds are the other yummy ingredients that make the grilled salmon scintillating. A tarragon-buttermilk dressing, also prepared in advance, is a light, tasty accompaniment. With all the ingredients (except the mango and avocado) chopped and ready to assemble, we turned this into a meal quickly when we arrived home ravenous after Sunday church. It was on the table in minutes.

Our strawberry vines were babies this year, but next year we hope to be strawberry gardeners for sure. Wouldn't that be a kick--growing our own strawberries for this incredible summer meal?


Grilled Salmon-Fruit Salad

3 ounces fresh or frozen salmon fillets
1 tablespoon olive oil
1 tablespoon lime juice
1 to 1 1/2 teaspoon Cajun seasoning (we use salt-free)
6 cups torn fresh spinach leaves
2 oranges, peeled and sectioned
1 cup fresh strawberries, halved
1 medium avocado, halved, seeded, peeled, and sliced
1/4 cup chopped almonds, toasted
salt-free tortilla chips, purchased tortilla bowls, or tortilla wraps
tarragon-buttermilk dressing (recipe below)

Thaw fish, if frozen. Rinse fish; pat dry with paper towels. Brush fish with oil; sprinkle with lime juice and seasoning. Place fish on a well-greased grill. Grill for 4-6 minutes per 1/2-inch thickness of fish or until fish flakes easily when it is tested with a fork. Break fish into bite-sized pieces. In large bowl, combine fish, greens, oranges, strawberries, avocado, mango, and nuts; toss gently to mix. Spoon mixture into tortilla bowls or over tortilla chips or onto soft tortillas for wraps. Drizzle with tarragon-buttermilk dressing.

Tarragon-Buttermilk Dressing

In small bowl stir together 1/2 cup buttermilk; 2 1/2 tablespoons mayonnaise and 1 teaspoon snipped fresh tarragon or 1/4 teaspoon dried tarragon, crushed. (If you don't have buttermilk or you want a fat-free variety, pour 1 1/2 teaspoons vinegar into a measuring cup; finish filling it with skim milk until the 1/2-cup measure line is reached. Allow mixture to stand about 5 minutes before you add mayonnaise and tarragon.)

Tuesday, August 17, 2010

Watch out, McDonalds! Hubby's healthy, fruit-filled smoothies are giving you some competition

My hubby was fast drinking himself into an early grave.

His drug of choice had nothing to do with alcohol. (For sure, he is a teetotaler.) Instead it was coffee creamer--gallons of it--French Vanilla in flavor, which he dumped into his morning cup and stirred into it a thimbleful of coffee for good measure.

Add that to an at-least-twice-weekly treating of himself to a large chocolate shake from McDonald's--comfort food, he'd say.

Why should he be surprised when, on his annual physical exam last November, his triglyceride levels shot to the moon and back? Other items on the blood report also weren't what he wanted to see either. Almost pre-diabetic was the word that got his attention as medical authorities tossed it out. A nutritionist, brought in for consultation as part of interpreting this bad-news blood test, asked him about his diet. After getting out of him the true facts about the sea of coffee creamer and the levithan chocolate shakes, she rolled her eyes as her way of signaling, "No-brainer."

Ditching the coffee creamer and triple-thick McDonald's shakes should bring on some better results fast, she assured him.

Her advice was golden--along with resuming his long-put-off habit of jogging (he's up to three miles a day, five-days-a-week now) and a new overall healthy eating plan. The triclyceride levels soon plummeted dramatically, as did his blood-pressure, cholesterol levels, and overall weight. But since the French Vanilla coffee creamer and shakes had been his comfort food, something had to be subbed in their place.

The answer? Smoothies. Hubby learned to be master of the smoothie machine--a.k.a. our new blender, which has its own special smoothies setting on it (a sign of the times). Creativity reigns--along with whatever fruit combination happens to be in the fridge or fruit bowl at the time. Blueberries, grapes, cherries, mangos, peaches, pears, apples, oranges, cantaloupe, bananas--the day's challenge (instead of seeing how many shakes he could sneak in) now became finding some new flavor combination that he hadn't tried the day before.

At various times, granola, wheat germ, almonds, unsalted peanuts also got tossed in, along with limitless flavors of fat-free, low-carb yogurt. The creamy smooth, milkshake-like texture of his smoothies replaced the effect of the McDonald's shake going down. On occasion he even tossed in a teaspoonful of dark chocolate cocoa powder (since dark chocolate now is considered one of the power foods).

McDonald's lovers don't know what they're missing. Furthermore, the pounds continue to roll off of him even while he guzzles down two fruit-laden smoothies a day. Impossible--but true! He makes it look easy--and delicious.

The real challenge occurred when I tried to get him to zero in on one smoothie recipe I could feature in this blog. Since many of the fruit that go into his beverages are straight from our garden, I couldn't resist mentioning his concoction in The Newfangled Country Gardener. As with the Granny Ladies of old, his smoothies truly were in the "dash-of-this-little-dab-of-that" category--nothing that could be measured.

However, I finally got him pinned down after over the weekend he brewed up an especially delicious drink.

Here, then, is his original creation--"Hubby's Life-Saving Nectarine-Banana-Apple Smoothie". Watch out, McDonald's. Your triple-thick shake now has some serious--healthy--competition!


Hubby's Life-Saving Nectarine-Banana-Apple Smoothie

1 medium nectarine
1 medium red delicious apple
1 large banana
1/4 cup unsalted peanuts
1 cup skim milk
1 tablespoon dark-chocolate cocoa powder
1 6-ounce container lowfat peach yogurt (he uses Kroger-brand CARBmaster)
1 8-ounce glass filled with ice

Peel nectarine and banana; chop. Remove core but leave on peel and chop apple. Dump these ingredients along with unsalted peanuts, milk, cocoa, yogurt, and 1 (8-ounce) glass ice into blender. Blend until fruit, nuts, and ice is chopped fine and mixture is blended into a creamy smooth texture. Other types of fruit, nuts, and yogurt may be substituted depending on preference.


Monday, August 16, 2010

"Best-ever" thing to make from peaches goes on shelf to enjoy for the rest of year

Whew! Mission accomplished!

For me, some food endeavors merit a great big, self-pronounced atta-girl once they're behind me.

When the peach orchard began producing in the spring and we saw that this year was going to be a watershed year where peaches were concerned, Peach Preserves, which I always consider to be a mammoth accomplishment, always were on my radar screen.

As I mention in Way Back in the Country Garden, my new cookbook, I consider Peach Preserves to be the absolute best thing that can be made from a personal peach harvest.

The recipe's not that difficult--the preparation simply involves a matter of settling in and simply getting it done. Boiling the jars, rounding up the lids and rings, peeling the peaches. The actual making of the preserves is a fairly short process compared to all the get-ready steps.

Hubby helped by being the Champeen Peach Peeler and making the grocery runs to buy some fresh lids for this year. He also helped remove the hot jars, once sterilized, to dry on clean towels spread out on the counter. That freed me to concentrate on the peach mixture.

What an absolute high I got when I finally began ladeling the preserves into jars and watch as the golden, thick syrupy mixture with giant peach chunks began settling itself into its new home in the clear jars on the countertop! Into the boiling water bath they went so the jars would seal. I never run out of excitement when I hear the telltale "click" of the jar lids as a sign that the sealing is successful. The jars then go on the pantry shelf for our dining enjoyment in the months ahead; I'll also give the best-looking ones as gifts.

One jar remained unsealed, of course. That's the one that went into our fridge so we could begin sampling this delicacy. We've already spread some on oven toast and on a few Fresh Peach Muffins, the recipe for which I've shared earlier. Tomorrow morning I intend to make some from-scratch biscuits (from Neta Welborn's recipe in the cookbook that Truett Welborn furnished me; I wrote about it in an earlier blog.)

Atta-girl for sure! The Peach Preserves are worth every bit of the effort--a gift that should keep on giving until the next spring.

Peach Preserves

8 cups peaches, peeled, pitted, and sliced (about 4 pounds)
2 tablespoons fresh lemon juice
1 (3-ounce) package powdered pectin
7 cups sugar (although I usually use sugar substitute, for this recipe I use really sugar)
1/4 teaspoon almond extract

Combine peaches, lemon juice, and pectin in a large pot or Dutch oven. Bring to a rolling boil and stir gently. Add sugar and return to rolling boil. Boil hard for 1 minute; stir constantly. Remove from heat. Skim any foam. Add almond extract and mix. Pour into hot jars; leave 1/4-inch headspace. Adjust caps and process for 10 minutes in boiling-water bath. Makes about 6 12-ounce jars.


Friday, August 13, 2010

The onions of summer get a fitting farewell as they become part of a warm potato salad recipe

Pulling the last--the very last--onion from the onion bin to use with a recipe prompted a walk down memory lane.

Our onion supply that had amply filled the basket on the porch had endured since late winter, when Hubby bent down in the bleak, empty expanse of dirt out back--a space that soon would become so prolific with this year's garden yield.

In his annual ritual he had visited Roach Feed & Seed and brought onion sets, put them out in bare ground under a gray, early February sky, and dreamed of weeks ahead when he'd be surrounded by green and growing things.

Some wonderful onions did emerge from that February planting. And of course the onions were followed by the lettuce, tomatoes, cucumber, corn, zucchini, okra, and cabbage that we've enjoyed all summer. That's in addition to the plums, peaches, and pears that have been part of this year's harvest.

But now the onion basket was down to the dregs. The recipe in which they got chopped up and used--Heidelberg German Potato Salad--represented a tasty, ceremonial goodbye to the onions that have helped spice up salads, vegetables, and casseroles for the past six months. Thank you, onions!

Thankfully that's not the end of the garden for the year, however. As fall beckons bushy green pepper plants are ready to give their abundant birth. At least half a dozen cantaloupe are peeking through the leaves on the ground. We're spotting four big watermelons that soon will be bringing us a late-summer delight. And the ubiquitous okra--the hotter things get, the more it produces. All these still will be around a while. Then we have the fall garden to which we can look forward. Hubby has his fall tomatoes already in. And what will become of his recent planting of pumpkin seeds? Our Halloween jack-o-lantern? Time will tell.

Heidelberg German Potato Salad brings a different twist to a potato-salad recipe. Served warm with an apple-cider vinegar/bacon-drippings dressing, it is a delicious side dish to a summer meal. Years ago I pulled it from the pages of a Family Circle magazine and stuffed it in my summer-recipe file. For my last rose of summer--the last onion in this year's onion bin--it represented a fitting farewell.


Heidelberg German Potato Salad

5 pounds redskin potatoes
2 cups water
2 beef bouillon cubes (we use reduced-sodium cubes)
1/2 pound bacon, diced (we use turkey bacon)
1 sweet onion, diced
1/2 cup vegetable oil (we use olive oil)
1/3 cup apple-cider vinegar
1 tablespoon sugar (we use sugar substitute)
3/4 teaspoon salt (we use salt substitute)
1/4 teaspoon black pepper

Place potatoes (unpeeled) in a large pot and cover with cold water. Salt lightly. Bring to a boil and continue to boil gently for 15 to 20 minutes or until fork tender. Drain and cool slightly. Peel while still warm. Slice and place in a large bowl. While potatoes are cooking, bring 2 cups water to a boil; stir in bouillon cubes until dissolved. Set aside. In a large skillet cook bacon until it is crisp. Break bacon into bite-sized pieces. Spoon bacon and 1 tablespoon bacon grease over potatoes. Add bouillon, onion, oil, vinegar, sugar, salt, and pepper. Mix gently. Serve warm. Actually takes even better after a night in the fridge, then warmed up or served cold.


Thursday, August 12, 2010

Lemon Ice-Box Pie--not just for summer but for blazing hot summer; we've got one!

Since when does Lemon Ice-Box Pie belong in a column about gardening and dining on food from the garden?

Since last January when Hubby and I were in Phoenix for the birth of First Grandboy to be born this year. (Second on the way. Aren't we rich in little grandpeople?)

That's when we encountered a new kind of garden--a citrus grove. In their new home our kids have a vast number of citrus trees in their back yard. Grapefruit, oranges, lemons . . . we encountered them by the bucketsful. We brought zillions home with us and barely made a dent in their supply. Every morning we became accustomed to fresh-squeezed orange juice, grapefruit fresh from being picked, and lemons the size of basketball, or so they seemed. When the supply ran out, we experienced a citrus withdrawal, to be sure.

For them Way Back in the Country Garden involves a stroll out back to see what they could reach in the trees to pluck. (My new cookbook features recipes that had their origin from spending several weeks in the midst of that citrus grove.)

Back to the Lemon Ice-Box Pie, however. On my Summer Must-Have List, I still hadn't managed a check mark by this summer delicacy, which Hubby says is not just synonymous with summer but also with summer in August. Well, what have we here? Summer in August in every sense of the word--scorching hot, nary a rain cloud in sight, triple-digit days--August to the max.

Truly time for a Lemon Ice-Box Pie.

Out popped my mother's tried-and-true Lemon Ice-Box Pie recipe (which appeared in my first cookbook, Way Back in the Country--graham cracker crust, juice from lemons (unfortunately not from our son's winter citrus grove but instead from the local Kroger's) mixed with nonfat sweetened condensed milk, meringue baked to a golden brown. On the (sometimes sore) subject of meringue, since we use egg substitute (Egg Beaters) totally now, I've switched to cooking with egg whites from the product called "Just Whites", a powdered egg-yolk mix, from which I've had more success than using the actual white of the egg (which sometimes brings groans of non-success from even the best cooks). Using the egg-white substitute produces fluffy, tall meringues that don't turn weepy even after several days in the "ice box", which is where the Lemon Ice-Box Pie ultimately resides.

The combination of tart and sweet in the pie filling, surrounded by the crumb crust and high-topped meringue, chilled to perfection after several hours in the fridge, combines for an August dessert that would make any citrus grove proud.


Lemon Ice-Box Pie

Graham-cracker crust of your choice (purchased or made from the recipe on graham-cracker crumb box)
1 can sweetened condensed milk (not evaporated milk ; we use non-fat)
1/2 cup lemon juice (about 3 fresh lemons squeezed)
1 teaspoon lemon peel, grated
2 egg yolks (or 1/2 cup egg substitute)

Mix filling and pour into prepared crust. For meringue mix 2-3 egg whites, 1 teaspoon vanilla, and a pinch of cream of tartar. With electric mixer beat until soft peaks form. Add 2 teaspoons sugar and continue beating until stiff peaks form. Spoon over pie crust containing filling. Bake in 375 degree oven about 15 minutes or until meringue is golden brown. Cool pie; then refrigerate for several hours before you serve. Makes 6 servings.


Wednesday, August 11, 2010

Try Asparagus Salmon Salad for a serving of health in a bowl

A recipe that's literally health in a bowl--Asparagus Salmon Salad.

I picked up the recipe from a cookbook called Simply Colorado--one time when I was visiting in that great state of Colorado. The line of recommendation that appeared under the title read, "Attractive salad that's ready in minutes."

All that is true. It assembles lightning quick--a good mini-meal to put together, for example, when you get home from Sunday church and want to get food on the table quickly. With both vegetables and the fish in the salad, you really don't need to serve it alongside anything else, since it works as an entree. (We did, however, heat up some Renie's Cheesy Potatoes--in a few days I'll be sharing the recipe for that good dish.)

What I failed to say was that the salad, when assembled, looks and tastes as though it is something you might be served in a fancy, upsale restaurant.

To the basic ingredients I added a sprinkling of Swiss cheese on top. With just me and Hubby under our roof, Asparagus Salmon Salad lasted for two dinners and a lunch.

In it we got our quota of salmon, spinach, and tomatoes--those oft-touted power foods--for the week, so I felt virtuous, plus the dish is so colorful and attractive, I felt as though I was a master chef--all over an entree that can be put together in under 20 minutes from start to finish.

Asparagus Salmon Salad

1 tablespoon olive oil
1/2 cup rice vinegar
1 teaspoon Dijon mustard
1/4 teaspoon dried whole thyme
1/4 teaspoon salt (we use salt substitute)
3/4 pound fresh or frozen whole asparagus
1 can (6 3/4 ounces) salmon, drained and flaked, or leftover salmon (I baked a fresh salmon filet in the oven for about 15 minutes to use as my salmon ingredient)
spinach leaves
2 tomatoes, cut in wedges
freshly ground pepper
shredded Swiss cheese

In a jar combine oil, vinegar, mustard, thyme, and salt; shake vigorously. Chill. Steam asparagus until tender (about 3-5 minutes); cool. Line salad plates with lettuce leaves. Arrange asparagus spears, salmon, and tomato wedges on lettuce. Drizzle dressing over top; season with pepper. Sprinkle shredded Swiss cheese on top. Chill until ready to serve.


Tuesday, August 10, 2010

Kid-friendly sloppy joe mix helps sneak veggies past the unsuspecting

OK, here it is, friends--the recipe I've been mentioning for the past several blogs. Wonderful- tasting, quick, ample--and best of all, a way to sneak veggies down the unsuspecting (aka, kids).

The recipe for Cabbage Sloppy Joes was like so many of the others--discovered in desperation when Hubby, a few years back, brought in from our garden more heads of cabbage than we could even get our minds around.

I began hunting (yes, Internet searches help immensely at such times) for offbeat uses for this bounty. That's when I found the instructions for cooking Cabbage Sloppy Joes. Whoever would have thought? The author of the recipe mentioned that the cabbage gave the mixture a slightly sweet taste and of course made it more full-bodied than was the average means of preparing sloppy joes, to be served over buns.

The addition of brown sugar, ketchup, lemon juice, and mustard make a nice sauce to wind around the browned ground turkey and tender cabbage. Other than chopping and shredding the cabbage, enough to make 1 1/2 cups, you can make quick work of this on-the-table-fast dish. Earlier this week a friend was on hand to help me get this recipe pulled together (I'm cooking and freezing some meals to take to our little expectant couple when they bring our grandson into the world later this month; my friend was helping me with this assembly-line enterprise.) She was absolutely incredulous at how quick this meal materialized. I knew she also was thinking the same thing that drew me to Cabbage Sloppy Joes--this is something her kids might like.

Every summer at cabbage time, I always start salivating for Cabbage Sloppy Joes (recipe also found in my new cookbook, Way Back in the Country Garden) and know that they are only a few days around the corner. Throw a few carrot sticks and a few grapes on the plate, and it's a summertime, don't-have-to-heat-up the kitchen meal that will stick in your memory for a long time.


Cabbage Sloppy Joes

1 pound ground beef or ground turkey
1 1/2 cups finely shredded cabbage
1 medium onion, chopped
1 celery rib, chopped
1/4 cup chopped green pepper
1 cup ketchup (we use the no-salt variety)
3 tablespoons brown sugar
2 tablespoons lemon juice
1 tablespoon vinegar
1 tablespoon Worcestershire sauce
1 tablespoon prepared mustard
1 teaspoon salt (we use salt substitute)
dash pepper
8 buns, split

In large skillet cook the ground beef (or turkey), shredded cabbage, onion, celery, and green pepper over medium heat until meat no longer is pink and vegetables are crisp-tender. Drain. Stir in the ketchup, brown sugar, lemon juice, vinegar, Worcestershire sauce, mustard, salt, and pepper. Cover and simmer for 10 minutes or until cabbage is tender. Spoon 1/2 cup onto each roll. Makes 8 servings.


Monday, August 9, 2010

Too many recipes left at the end of the fruit supply? Roadside produce stands are the answer

The old saying, "Why do I have so much month left at the end of the money?", could be applied to where we are season-wise right now.

I'm thinking (and mourning), "Why do I have so many peach recipes left at the end of my summer?"

The peaches long ago left our trees; the branches, though still green and leafy, are sadly bare of fruit and will remain that way until next June.

And yet my recipe file still brims with untried recipes that didn't get brought to life before the peach crop faded away. One of those was an all-time winner, "Peach-Blueberry Pie", which combines two of my favorite fruit in all the world. It appears in my new cookbook, Way Back in the Country Garden, but truthfully, I don't think I prepared it all last summer or maybe even the summer before. It's the absolute greatest, but yet another year was breezing by without it materializing.

Enter Ham's Orchard. Until a few weeks ago I probably was the only North Texan alive who didn't know about this fun little spot, just east of Terrell off Highway 80. A combination roadside market/fudgery/burger stand, Ham's is best-known for its many varieties of peaches produced from the massive orchard adjacent to the indoor produce stop. A few weeks beforehand my daughter and her husband had been introduced to Ham's and had suggested we take a Sunday-afternoon drive to tour it as well. I knew Ham's would have to be special to entice my daughter, who is very great with a child (did I say very?) and desperately seeks to avoid crowds, to brave Ham's crowded aisles to show us this haven of goodies.

Perhaps Ham's best draws are the fresh homemade peach ice cream and peach shakes that are wildly popular with customers, especially on extremely hot Texas summer afternoons. Other delicacies are the homemade peach cobblers and ready-prepared meals that are sold ready to be popped into the oven. On the Sunday afternoon we stopped in, customers swarmed around like bees after honey. I saw my opportunity to replenish my peach supply and give life to my "Peach-Blueberry Pie" after all.

With a small sack of some of Ham's finest tucked under my arm, I resisted the temptation for a soft-serve peach ice cream cone and instead envisioned my upcoming pie that soon would have intermingled morsels of peaches and blueberries bubbling through the squares in the lattice-topped crust. (I had a bag of blueberries left from an earlier visit to the Chickasaw Nation farmer's market, so now with the peaches I was in business.)

Happily, that dream was soon realized. Nobody we saw departing Ham's slurping peach shakes or licking peach cones on that Sunday afternoon had anything near the smiles on our faces that resulted from the first bite of my upcoming warm homemade Peach-Blueberry Pie.

Yay! I didn't have to wait another year to enjoy it after all.


Peach-Blueberry Pie

1 cup sugar (I use sugar substitute)
1/3 cup all-purpose flour
1/2 teaspoon ground cinnamon
1/8 teaspoon ground allspice
3 cups sliced peeled fresh peaches
1 cup fresh blueberries
1 tablespoon butter (I use unsalted, not margarine)
pastry for double-crust pie (9 inches)
milk (I use skim milk)
cinnamon
a "little" extra sugar to mix with the cinnamon

In a bowl combine sugar, flour, cinnamon, and allspice. Add the peaches and blueberries; toss gently. Line pie plate with bottom crust; add the filling. Dot with butter. Top with a lattice crust. Brush crust with milk; sprinkle with cinnamon and sugar. Bake at 400 degrees for 40-45 minutes or until crust is golden brown and filing is bubbly. Cool completely. Frozen fruit may be used if it is thawed and well-drained. Serves 6-8.


Wednesday, August 4, 2010

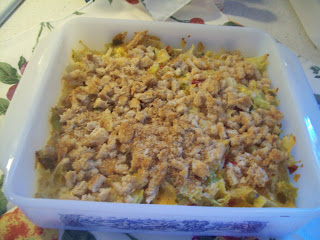
"Oui oui!" to French Cabbage, a most unusual but flavorful use of this summer veggie

I've never known what was French about it, but the French Cabbage recipe featured here is one to which we definitely say "Oui! Oui!"

I turned it up a few years back when our garden produced row after row of cabbage. I was desperate to find recipes that would incorporate the vegetable beyond the basic "boiled cabbage on the stovetop" routine.

Enter the Birchman cookbook, or as members of my family would teasingly mock me, "The Birch-man Cook-book", repeated in a singsong fashion. They did this because seemingly every dish I put on the table, for months and months on end, had its origin in this outstanding church cookbook that included one of the best recipe collections I've ever run across in a cookbook that was not commercially produced.

As, working my way through the cookbook I prepared the recipes, compliments abounded from those I served. "The Birch-man Cook-book", I'd reply to make sure proper credit was due. Pretty soon my family members turned this into a tease. "The Birch-man Cook-book," they'd reply. Thank you, Birchman Baptist Church in Fort Worth, for being a goldmine of excellent recipes then and now.

One of those, of course, was this one for French Cabbage. Our cabbage rows definitely weren't as prolific this year as they were in the one when we first began preparing this recipe, but I had several heads left in my refrigerator. (The final one went for Cabbage Sloppy Joes, which I'll feature in an upcoming blog.)

This makes a great, unusual, and colorful combination for a bring-a-dish buffet or potluck. People will be blown away when you tell them that cabbage is the main ingredient.


French Cabbage

1 medium cabbage
1 to 2 small bell peppers, chopped
3 to 4 cloves garlic, chopped
1 tablespoon butter
3/4 cup celery, chopped fine
1 cup whole milk (can use skim)
1 cup grated Cheddar cheese
salt and pepper to taste
toasted bread crumbs

Quarter cabbage and cook in small amount of water until tender; drain and chop fine. Cook celery, peppers, and garlic in butter until tender. Add to cabbage. Pour in cream and grated cheese. Mix well and place in a 9-by-9-inch dish. Put bread crumbs on top. Bake at 350 degrees for 30 minutes.


Cucumbers and Onions in Vinegar: the Grand Pooh-Bah of Summer Foods

When I was making my list of summer "must-haves" before waning August days try to steal our joy, I neglected the Grand Pooh-Bah of Summer Foods: Cucumbers and Onions in Vinegar.

Something about that tangy, always-makes-you-sneeze, vinegar and water combination that the cukes and onions soak in to give them their flavor bespeaks of a scorcher summer day.

Cucumbers and Onions (some people throw in a chopped-up tomato for a little color and taste alternative) couldn't be simpler to prepare, yet until now, when I'm my making list and checking it twice about what not to neglect before summer draws to a close, it hadn't occurred to me--we hadn't indulged in this one yet.

How could I overlook it, since it bears a place of honor in my new cookbook, Way Back in the Country Garden? It's a featured recipe as I describe my cousin Lynda's surprise wedding to her prince, George, and the memorable barbecue meal that followed.

Our cousins Bill and Jana brought Cucumbers and Onions fresh from their garden to serve at the lunch, which featured Mesquite Barbecue from the popular Mesquite eatery that our Uncle Herbert founded and where he became legendary for his Oyler Pit. (The recipe below can be attributed to Bill and Jana.)

It was a perfect complement for that barbecue, although last night at dinner it also went wonderfully well when Hubby and I dined on Cabbage Sloppy Joes (in a future blog I'll write more about that splendid recipe.) And yes, as if to pronounce Cucumbers and Onions in Vinegar a hit, Hubby graced it with a big sneeze as the pepper and the eau de tangy brine tickled his nostrils.

Hubby is bummed that our cucumber supply, despite all the vast, leafy vines that covered a portion of the garden, wasn't voluminous this year. It's on his 2011 Garden Resolutions list for next summer--a better cucumber patch.

But the few we have remaining we plan to enjoy down to the last tiny morsel floating in the vinegar-and-water sea. Summer, last just a little longer so we can enjoy all your good foods.


Cucumbers and Vinegar in Oil

2-3 medium cucumbers
1 medium onion
1/2 cup vinegar
1/2 cup water
1 teaspoon salt(we use salt substitute)
pepper to taste (the more you can stand, the better)

Peel cucumbers and slice horizontally. Slice onions crosswise. Put cucumbers and onions in a bowl. Pour vinegar and water over them. Stir to mix. Chill several hours before you serve. Serves 6-8.


Tuesday, August 3, 2010

Zucchini adds the magic touch to keep this Chicken Tortilla Soup from being ho-hum boring

As everyone knows, Chicken Tortilla Soup recipes are a dime a dozen. Most people have a favorite; most recipes follow a certain predictable pattern of ingredients.

Except this one--it had sliced, fresh zucchini added! Now, how Newfangled Country Gardener-ish can you get? Zucchini, to go with all the other fresh vegetables in this mixture--fresh corn off the cob, fresh tomatoes, cilantro. It sounded as though it would an extremely healthy rendition of an old favorite.

Thank you, Fry's'. (Fry's is not the electronics store but is the Arizona version of our Kroger grocery. When we're in AZ visiting our little family there, we're devoted Fry's shoppers, so we get on the mailing list for the Fry's circular just as we do the Kroger one. (By the way, Fry's and Kroger's are owned by the same parent corporation.) The Fry's circular featured this Chicken Tortilla Soup recipe.)

Talk about a dish that got healthier the longer it stuck around. The first night we served it, I just scattered a dash of cheddar cheese on top. The next day for lunch (I'm telling ya, this recipe made enough for two armies) I topped it with a little dash of sour cream. That night for dinner (this soup was so good, we never tired of leftovers; Hubby tolerated it for both lunch and dinner in the same day) I chopped up some fresh avocado and touched it up with a little more fresh tomato for garnish over all the other items. A meal in one, for sure!

Five meals later (no joke!) today at lunch I think Hubby and I will be polishing off the last morsel of this flavorful, healthy soup. I think the zucchini added the magic touch and kept it from being boring and left-overy. And best of all, it gives us just one more boost in the 5-to-9 fruit-and-vegetables category that we're supposed to have every day.

Never toss out that grocery-store circular without looking over the featured recipes. You might just find a gold mine like we did--probably the best chicken-tortilla soup ever!


Chicken Tortilla Soup

1 teaspoon olive oil
2 zucchini, cut into cubes
1 can (29-ounces) crushed tomatoes (or 2 1/2 cups fresh tomatoes, sliced in chunks)
6 cups chicken broth
1 cup fresh corn, cut off the cob
1 1/2 teaspoons cumin
1/2 teaspoon cayenne pepper
2 boneless chicken breasts, cooked and shredded
1 bunch fresh cilantro, chopped
optional toppings: sliced avocados, tortilla chips, shredded cheddar cheese, fresh limes, sour cream, chopped fresh tomatoes (any or all will do)

In a stockpot heat the oil. Add zucchini and saute for 2 minutes. Add the crushed tomatoes, chicken broth, corn, cumin, cayenne pepper, and shredded chicken. Heat to a boil. Turn down the heat and simmer for 15 to 20 minutes. Stir in a handful of chopped cilantro just before serving. To serve place a handful of tortilla chips in the bottom of a soup bowl. Ladle hot soup over the tortilla chips. Add a generous squeeze of lime and top with avocado, cheese, cilantro, tomatoes, and sour cream, if desired. Refrigerate any leftovers. Serves 4 to 6.


Monday, August 2, 2010

Summer can't get away from us without peach homemade ice cream

August has arrived--for us, that's good tidings of great joy. It's BABY MONTH. In just a few weeks our new little grandperson is expected. August no longer is some far-off destination trimesters away or even "next month". It's here! The days are ticking by. Soon we'll be meeting him. Yay!!

But as August and Grandboy's due-date roll around, so do the drill-team members and cheerleaders who start returning to the high-school next door to attend their get-ready practices for fall.

Every retailer from Lands'End to Walmart parades out its back-to-school wares. Sunny days are just a tad shorter. Before we blink an eye, we'll have run out of summer and be escorting in autumn.

So, on my summer "must-do" checklist, what's lacking? What have I not cooked that represents absolute the best of summer's essence?

No-brainer: HOMEMADE ICE CREAM! That freezer has not been off the shelf this year; the rock-salt box is undisturbed from the last time we made ice cream last year (or was it two summers ago? Horrors.)

And what did I have staring me right in the face? An unadulterated summer weekend--in fact, the hottest one so far, with temps in the triple digits and not a raincloud to dot the summer sky.

In the refrigerator I just happened to have a bowl full of peeled, chopped peaches--the last vestige of those from our garden's peach trees. Clearly the choice of how to use this supply already was made--homemade peach ice cream.

Oh, and did we love it, down to the very last peach morsel! My recipe, straight out of my new cookbook, Way Back in the Country Garden, was different from our tried-and-true one that we've used since early marriage. That one, though it had served us well for years and years, featured eggs as an ingredient; as anyone knows, uncooked eggs in recipes are big no-no's now, because of health fears over raw eggs. We've all had to dig a little deeper to find eggless or cooked custard-like ice-cream recipes that are suitable.

As I began pouring my peach mixture into the ice-cream-freezer canister, Hubby raised the usual skeptical eyebrow. "Nothing will happen with that," he scowled. "You have to add lots of whole milk. You don't have enough liquid in there. This isn't the way it works at all." I assured him that from the peach puree, enough liquid would materialize--trust me!

Through the entire freezing process, he paced around doubtfully. "This isn't going to work," he growled. (You have to understand that hubby LIVES to eat ice cream. The thought of something going afoul in ice-cream production was like the prospect of finding no goodies in the stockings on Christmas morning.)

Many churns of the electric ice-cream maker later, the moment of truth was now. With the dasher pulled out, the result was . . . beautiful, thick, peach-laced homemade ice cream! The peach puree indeed had saved the day. We could enjoy a record-setting high temp on a blistering August day with the best summertime dish around--Fresh Peach Homemade Ice Cream.

And for some odd reason when the fresh, frozen ice cream was scooped into bowls and eaten on the deck it didn't melt in the hot weather as fast as homemade ice cream usually does. Maybe it was the peach puree. Who knows?

August, nanny-nanny-boo-boo on you. You may be trying to sneak fall in on us, but with delicious bites of peach ice cream sliding past my taste buds, summer is here forever.


Fresh Peach Homemade Ice Cream

6 medium peaches (about 2 pounds), peeled and
stoned, or 4 cups frozen unsweetened peach slices,
thawed
1 cup sugar
3 cups heavy cream
1 cup whole milk
2 teaspoons vanilla extract

In a large bowl mash the peaches into a coarse puree. Stir in 1/4 cup of the sugar. Let mixture stand for 1 hour. To the peach mixture add the cream, milk, remaining 3/4 cup sugar, and vanilla. Stir to blend. Refrigerate, covered, until the mixture is very cold, at least 3 hours or as long as 3 days (the colder, the better--but at this point don't put in the freezing compartment of the refrigerator!) Stir the mixture to blend and pour into the canister of an ice-cream maker. Freeze according to the manufacturer’s directions. Eat at once or transfer to a covered container and freeze up to 8 hours. Makes about 1 1/2 quarts of ice cream.