Kay Wheeler Moore

Welcome to my blog

Hello. . .

The Newfangled Country Gardener is for anyone who has a garden, would like to have a garden, or who simply enjoys eating the garden-fresh way. I don't claim to be an expert; in this blog I'm simply sharing some of the experiences my husband and I have in preparing food that is home-grown.

About the author

Kay Wheeler Moore is the author of a new cookbook, Way Back in the Country Garden, that features six generations of recipes that call for ingredients that are fresh from the garden. With home gardening surging in popularity as frugal people become more resourceful, this recipe collection and the stories that accompany it ideally will inspire others to cook the garden-fresh way and to preserve their own family food stories as well. The stories in this book center around the Three Red-Haired Miller Girls (Kay's mother and aunts) who grew up in Delta County, TX, with their own backyard garden so lavish that they felt as though they were royalty after their Mama wielded her kitchen magic on all that was homegrown. Introduced in Kay's previous book, Way Back in the Country, the lively Miller Girls again draw readers into their growing-up world, in which a stringent economic era--not unlike today's tight times--saw people turn to the earth to put food on the table for their loved ones. The rollicking yarns (all with recipes attached) have love, family, and faith as common denominators and show how food evocatively bonds us to our life experiences.

Tuesday, November 30, 2010

Crustless Harvest Pizza gives "pizza night" new, more healthy meaning

This was just the best of the best! With fall days winding down and cranberry Christmas days approaching, recipes with the word harvest in them soon will be relegated to next-year's fall wish list. But on this, the last day of November, I can't think of a better way to give autumn a proper sendoff than to tell you about this Crustless Harvest Pizza. When I first saw the recipe, I wasn't impressed. Hours later, after the dish it produced made a satisfying dinner, I was sorry I hadn't prepared it many, many times previously.

Healthy, colorful yellow squash and zucchini, sliced into 1-inch slices, form the "harvest" of veggies on top. The crust is formed from the solidification of ricotta cheese, egg, and Parmesan cheese surrounding it as the dish bakes. The addition of chopped red and green pepper and green onion, sauteed, made one of the most colorful food items I've ever seen.

Believe it or not, when this emerged from the oven and cooled, it sliced with a pizza cutter into nice little squares that were firm and delightful. It gave the term "pizza night" new meaning, as those who are on restricted eating plans can feel as though they can still enjoy a good pizza slice without harming their health. My recipe source, the Celebrating a Healthy Harvest cookbook, has yielded another winner. In fact, even though the recipe has a fall-sounding name, I can't imagine a dinner quicker and easier to rev one up for a winter evening of decorating the Christmas tree!

Crustless Harvest Pizza

1 medium zucchini, sliced in 1-inch slices
1 yellow squash, sliced in 1-inch slices
1/2 red pepper and 1/2 green pepper, chopped
1/4 cup green onion, chopped
2 teaspoons olive oil
1 1/2 cups low-fat ricotta cheese
1 egg, slightly beaten (I used egg substitute)
3/4 cup grated Parmesan cheese
2 garlic cloves, diced
1/2 teaspoon salt (or salt substitute)
1 teaspoon pepper
3/4 cup mozzarella cheese

Preheat oven to 400 degrees. In small, nonstick skillet saute red and green peppers and green onion until tender. Set aside. Combine ricotta, egg, Parmesan, garlic, salt, and pepper, Spread mixture in a greased 8-by-8-inch baking pan (I used a glass pan). Spread mozzarella over ricotta. Lay squash slices over the top. Spread peppers and green-onion mixture over squash slices. Bake for 20 minutes or until the pizza firms up and is browned. Remove from oven and let pizza sit for 5 minutes before you cut it. Makes 8 squares.


Monday, November 29, 2010

As fall wanes, Pumpkin-Apple Butter recipe brings pumpkin season to a delightful close

The major thrust for pumpkin-recipe days are drawing to a close. Wednesday kicks off Christmas month, which means we'll be trading most things orange for reds and greens and the traditional foods of Christmas (plus menu items that can be prepared in a hurry during this frantic time.)

So to give my put-aside pumpkin puree one last hurrah before we switch gears, I had a great longing to make Pumpkin-Apple Butter. This recipe attracted me because I saw it could be stirred up in a hurry without the long and complicated cooking time that's often required of jellies, jams, and preserves. I was eager to try the pumpkin and apple combination. The Pumpkin-Apple Butter recipe from a long-ago Woman's Day magazine suggested this as a terrific gift idea since it could be poured into an attractive canister with a colorful ribbon and a note that says, "This is good on toast, waffles, English muffins, pancakes, and crackers, or use as you would apple butter." The recipe suggests that it can be refrigerated up to two weeks.

I was tickled that from start to finish this entire prep process required about 40 minutes, so it was way beyond easy—so easy that Hubby and I had it on our breakfast toast the very morning I stirred it up. And of course Hubby immediately claimed part of the leftover butter as an addition to one of his famous smoothies.

While dining on this exceptionally yummy topping I was immensely glad I had kept my Pumpkin-Apple Butter recipe all these years and glad I squeezed in this pumpkin delight while November rolled out its last days of a terrific, memorable fall.

Pumpkin-Apple Butter

3 1/2 cups fresh pumpkin puree (or 2 15-ounce cans of canned pumpkin)
2 cups unsweetened applesauce
2/3 cup packed light-brown sugar
1 1/2 tablespoons grated fresh ginger
1 teaspoon each ground cinnamon and nutmeg

Stir all ingredients in a heavy, medium saucepan until all ingredients are blended. Bring to a boil; stir often. Reduce heat to low and simmer uncovered. Stir often to prevent scorching and simmer for 30 minutes, or until mixture is very thick. Cool, spoon into containers, cover, and refrigerate. Makes 5 cups.


Friday, November 26, 2010

Is your week slightly upside down with busyness? This upside-down apple cake makes a great, quick Thanksgiving-week breakfast

We all know about pineapple upside-down cakes, but here's a new wrinkle—an apple upside-down cake. In my recipes that call for fresh apples was this little gem called Spiced Apple Cake that sounded just perfect for the Thanksgiving season. Although Spiced Apple Cake probably was designed to be a dessert, we ended up dining on it for breakfast for several mornings in the past few days. Looking for a great breakfast item to serve company who still might be in your house for the holidays? You can't beat this one.

One-and-a-half cups of peeled apple slices (any variety) go on the bottom of a nonstick pan that has had butter melted in it and sugar sprinkled over the apples. Then spray the sides with nonfat cooking spray. Trust me—this preparation is sufficient to guarantee that the cake will turn out of its pan without hassle—even in a pan that's not of the nonstick variety (the kind I had on hand to use, by the way). When the dessert emerged from the oven, I approached the removal of it with great trepidation, but I let it cool for about five minutes, ran a spatula around the edges, and used the spatula to dig underneath the cake a little to be sure all was loosened. Holding my breath I turned it over on a cake plate and voila! a perfect unfurling of a perfect cake, with all the apple topping in place!

Family Circle magazine of a few years back gets credit for this delightful recipe, which recommends serving it slightly warm with whipped cream. Fat-free whipped topping for us, of course, although without that on hand, we used Hubby's fat-free vanilla yogurt instead. Divine! Boy, were we sorry when this little upside-down dish was gone—good to the very last crumb.


Spiced Apple Cake

11 tablespoons unsalted butter, softened
1 1/4 cups packed dark-brown sugar (can use brown-sugar substitute)
1 1/2 cups peeled apple slices, any variety
2 cups all-purpose flour
2 teaspoons baking powder
1/4 teaspoon ground cloves
1/2 teaspoon ground allspice
1/4 teaspoon salt (or salt substitute)
2 eggs (or egg substitute)
2/3 cup milk (we use skim milk)
whipped cream, if desired (or fat-free whipped topping)

Place 3 tablespoons of the butter in a 9-inch round nonstick cake pan. Coat sides of pan with nonstick cooking spray. Place pan in oven while heating the oven to 325 degrees. When butter is melted, remove pan from oven. Sprinkle with 1/4 cup of the sugar. Carefully fan apple slices, overlapping in pan. Sift flour, baking powder, cloves, allspice, and salt into a medium-sized bowl. Set aside. In a large bowl beat remaining 8 tablespoons butter and remaining 1 cup sugar until sooth. Beat in eggs. Add half the flour mixture, then milk, then remaining flour. Beat until smooth. Pour into pan. Bake cake at 325 degrees for 1 hour or until pick inserted in center comes out clean. Run a think knife around cake; invert onto a plate. Remove pan; replace any apple slices stuck to pan. Serve slightly warm with whipped cream, fat-free topping, or nonfat vanilla yogurt.


Wednesday, November 24, 2010

Glazed Sweet Potatoes—look no further if you're still digging around for a Thanksgiving sweet-potato recipe

In an earlier blog I mentioned the heretical act of subbing a new green-bean recipe for the time-honored Green Bean Casserole that's typical Thanksgiving fare. I really stepped across the line this year when I also subbed Glazed Sweet Potatoes for the traditional, pecan-topped sweet-potato "candy" that families have used for decades. I love that version—Sweet Potato Casserole that appears in my first cookbook, Way Back in the Country, and that was introduced in our family by my cousin, Jana. But I was itching to try a new sweet-potato recipe this year; we gave a high-five to the outcome.

Glazed Sweet Potatoes is simple enough—prepared with fresh sweet potatoes with a glaze of maple-flavored syrup (we used sugar-free syrup) mixed with brown sugar, butter, and spices. But oh, what a hit! I truly believe it was the star of my "drive-by" Thanksgiving dinner that we pulled together for our family time days ago. I even prepared it twice before Thanksgiving. I had some fresh sweet potatoes left over and decided to create it a second time.

Anyone who wants a sweet-potato dish on the Thanksgiving table but who doesn't want to go to the fuss (although a worthwhile fuss, I might add) of the traditional casserole would be smart to whip this one up quickly. Recipe courtesy Taste of Home magazine. Although he's complimentary of everything, Hubby deep-down likes his sweet potatoes rather basic, so with this dish he was enthralled, to say the least!

Happy Thanksgiving cooking! Today's the marathon day! Enjoy yourselves in your kitchen and relish in the foods of this great holiday.

Glazed Sweet Potatoes

2 pound medium sweet potatoes or 2 cans (18-ounces each) sweet potatoes, drained
1/4 cup butter
1/4 cup maple-flavored syrup (I used sugar-free)
1/4 cup packed brown sugar (I used brown-sugar substitute and used only 1/8 cup)
1/4 teaspoon ground cinnamon

If using fresh sweet potatoes, place in a kettle, cover with water, and cook covered for 25-35 minutes or just until tender. Drain; cool slightly. Peel and cut into chunks. Place cooked or canned sweet potatoes in a 2-quart baking dish. In a small saucepan combine butter, syrup, brown sugar, and cinnamon; cook and stir until mixture boils. Pour over potatoes. Bake at 350 degrees for 30 to 40 minutes or until mixture is heated through. Makes 8 servings.


Tuesday, November 23, 2010

Harvest Chili show-stopper on any Thanksgiving table or for family meals on this week of mega-food prep

Also left over from our earlier Oklahoma roadside stand visit: a large butternut squash as well as a pattypan squash. I knew these were just begging for some wonderful recipe to be included in, but I wasn't really familiar with cooking either. I've always been very "garden-variety" (no pun intended) where squash was concerned—yellow squash and zucchini were the extent of my repertoire. (At the roadside stand Hubby scooped these up because he thought these looked interesting.)

My Celebrating a Healthy Harvest handbook fortunately helped me out in a wonderful way. The recipe for Harvest Chili was a lifesaver. But peeling the extra-tough skin on the butternut squash was a challenge. The recipe didn't say to do so, but I heated up a large pot of boiling water and boiled the butternut until it softened up and peeling was easy.

Adding the fresh corn, fresh tomatoes, and green bell pepper made this a healthy as well as colorful combination—perfect for Thanksgiving week, especially since folks are trying to limit their food intake to make room for that extra amount of Thanksgiving Day dining in which they plan to indulge. Harvest Chili was so enjoyable, we dined on it for both lunch and dinner in the same day for many days.

Also, quick and easy describe this prep—a good idea since most of us are busy readying for Thursday's dinner. The ease of preparation of this Harvest Chili can halt the fast-food-to-go line temptation on this week of (food) weeks, so you can serve your family something nourishing while not sacrificing precious time in the kitchen. Or, thinking outside the box, Harvest Chili would be a show-stopper on any Thanksgiving table.

Harvest Chili

2 tablespoons cooking oil
2 pounds butternut squash (or a combination of butternut and pattypan)
1 large onion, coarsely chopped
1 clove garlic (or 1/4 teaspoon garlic powder)
2 cups fresh tomatoes (or 1 14-ounce can, undrained)
1 cup water (If you are using canned tomatoes, omit the water.)
1 large green bell pepper, seeded and chopped
3 large ears of corn, cooked and cut from the cob
1 small can green chilies or 1/2 cup fresh, chopped
1/2 teaspoon salt (or salt substitute)
1/2 teaspoon pepper

Peel and chop squash into 1/2-inch chunks. Heat oil in skillet and add squash, onion, and garlic; cook for 5 minutes over medium heat. Add tomatoes and green pepper; bring to a boil over medium heat. Reduce heat to medium-low and cover; simmer for 15 minutes. Add corn, chilies, salt, and pepper; simmer covered for 5 minutes or until squash is tender. Uncover and increase heat to high. Cook for 5 minutes or until the liquid is reduced; serve.


Monday, November 22, 2010

Plethora of pumpkin seeds yields a crunchy, spicy mix with a variety of uses

All that wonderful pumpkin puree from our fall pumpkins now sits in neat little containers in my freezer as it waits to be called on for service. (And it will be, as Hubby and I LOVE anything pumpkin.) But what about the plethora of pumpkin seeds that were extracted at the same time the pumpkin pulp was processed?

"Be sure and don't throw them away," Hubby, who finds uses for anything--even the hairy skin on kiwi fruit, which he grinds and installs into smoothies--cautioned.

Right, be good stewards of all God gives us, I knew in my heart to be correct. Waste not, want not, I could hear my mother's voice in my head. But pumpkin seeds? I've never been a big fan of the beyond-bland way they taste when they are oven-roasted.

Then I derived a plan. "You be the super-sleuth," I entreated Hubby. "Why don't you do an Internet search and see if you can find some unusual way to prepare them?" If preserving the pumpkin seeds was vastly important to him, perhaps he could be the one to find a newfangled hint.

Good for Hubby, he did just that. Going online he found this recipe for Spiced Oven-Roasted Pumpkin Seeds, which turned the ordinary into the extraordinary. Just the simple addition of sugar substitute and spices made the pumpkin seeds positively yummy, not to mention what the aroma of this spicy mix being cooked did for the house.

These were great for snacking by themselves, for tossing on breakfast cereal, or, of course, for Hubby's favorite pastime--finding new ingredients to add into his smoothie potpourri.


Spiced Oven-Roasted Pumpkin Seeds

1 cup pumpkin seeds (the amount produced by the average-sized pumpkin)
1 tablespoon melted butter or vegetable oil
1 tablespoon granulated sugar, or more, to taste (or sugar substitute)
1 teaspoon cinnamon
1/4 teaspoon nutmeg
1/8 teaspoon allspice

Rinse seeds well; remove as much of the pumpkin pulp as possible. Some of the small pieces of pumpkin will adhere to the seeds, but they won't hurt the seeds at all and might even add more flavor. Pat dry with paper towels. Don't let them dry completely on the paper towels, because they might stick. Toss seeds with the butter, sugar, and spices. Heat oven to 300 degrees. Spread coated seeds on a shallow baking sheet; you can line a baking sheet with nonstick foil to make cleanup easier. While you are baking them, turn seeds from time to time (about every 15 minutes) for about 45 to 60 minutes, or until nicely browned and crunchy.


Friday, November 19, 2010

Chili-Macaroni makes a healthy timesaver for Christmas rat-race days fast upon us

The clock ticketh in terms of Christmas Month Food Prep. Since Thanksgiving Week next week brings on the start of the Christmas ratrace, the days soon will be mega busy, with almost no available moments for preparing regular meals. I like to have the freezer well-stocked with food at the ready—usually doubles of items I've fixed in November or late October. When the Christmas marathon begins, I'm never regretful of having meals already on hand.

Keeping those meals healthy also is paramount now. In previous years I might have stocked up on such convenience items as rotisserie chickens from the grocery deli, takeout fried chicken, or readymade pizza. But last Christmas was our first year to be on our improved eating plan and to try to reform some of our unhealthy ways. Even the most motivated find Christmas time to be an automatic trap for weight gain, so I've tried to put aside only food items made the healthy way—meals that won't cause us to backslide.

Chili-Macaroni, made from a Better Homes & Gardens website recipe, fell into this category. Hubby and I enjoyed Chili-Macaroni during a November meal and spotted it as a perfect one to make in bulk and freeze for the "December-10K" time fast approaching. I loved the fact that it had fresh green beans and a fresh tomato cooked right into it, so veggies already were a part of the deal, as was whole-grain pasta. At the time I prepared it, I made and froze an extra batch, so it's waiting for a sure-to-arrive December night when the day has been jammed with Christmas "to-do"s and I feel clueless about mealtime that has arrived too soon.

Try as we might, most of us can do little about the fact that pre-Christmas days overwhelm us, but we can feel smug about the fact that meals already are taken care of. Chili-Macaroni joins some containers of Spaghetti Sauce Excellente, Vegetable Soup, King Ranch Chicken, and a few other freezables lying in repose in my deep-freeze right now for some for-sure future mealtimes when I'll be ready to hug them and kiss them just for being there to save my life.

Chili-Macaroni

12 ounces ground turkey
1/2 cup chopped onion
1 (14.5-ounce) can tomatoes and green chilies
1 can tomato sauce (no-salt added)
1 fresh tomato, choped
2 teaspoons chili powder
1/2 teaspoon garlic powder
1 cup whole-grain elbow macaroni or bow-tie pasta
1 cup fresh cut green beans
1 cup shredded Cheddar cheese
tortilla chips

In a very large skillet cook ground turkey and onion over medium heat until turkey is brown and onion translucent. Drain off fat. Stir undrained tomatoes and green chilies, tomato juice, fresh tomato, chili powder, and garlic powder into meat mixture. Bring to boiling. Stir in pasta and green beans. Return to boiling; reduce heat. Cover and simmer about 15 minutes or until pasta and green beans are tender. Top with shredded cheese and serve with tortilla chips. Makes 4 servings.


Thursday, November 18, 2010

This squash melange certainly rated best in our pre-Thanksgiving "show"

The saved recipe that once appeared in the newspaper stated only that it was "Best of Show—All American Casserole Contest". Since I cut the clipping out long ago, I didn't preserve with it the headline saying "Best of Show" where or when. The State Fair of Texas? Some other kind of local bakeoff? My info was incomplete. Yet any recipe that's labeled "best" of something, I eventually have to try.

So as I planned my menu for my "drive-by" Thanksgiving I mentioned in yesterday's blog, I automatically zeroed in on this choice, because I saw it had been a winner. Only winners for my family for this special gift we were handed of our son dropping in for a pre-Thanksgiving visit.

Fresh zucchini and fresh yellow squash, called for to make the casserole, were vegetables we had on hand after our recent stop at the Oklahoma farm stand I mentioned in a previous blog. They were diced and boiled and mixed with sour cream and cheddar cheese. On top went crushed butter crackers. Hubby and I enjoy the fact that a lightly salted variety of Ritz crackers (officially called Hint of Salt) is available; this works well for snacking in Hubby's sodium-restricted eating plan. These crackers I now used crushed for the crust on top.

Ultimately this squash melange looked fabulous in the mix of Thanksgiving offerings on our buffet table. Even some avowed non-squash-eaters that dined on this recipe gave it rave reviews and wanted to know how it was made.

The "Best-of-Show" title for this casserole certainly lived up to its name. Days later when we were cleaning up leftovers, everyone was begging for the last morsel of this tasty dish that couldn’t be more Thanksgiving fare than if it had been served by the Pilgrims.

Yellow Squash-Zucchini Casserole

6 cups large diced yellow and zucchini squash
vegetable oil
1 large onion, chopped
4 tablespoons butter
1/2 cup fat-free sour cream
1 teaspoon salt (or salt substitute)
1/2 teaspoon black pepper
1/4 teaspoon garlic powder
1 cup grated (2-percent milk) cheddar cheese
1 cup crushed butter crackers (tried with Ritz lightly salted variety)

Preheat oven to 350 degrees. Sauté squash in a little vegetable oil over medium-low heat until it is soft, about 15 to 20 minutes. Line colander with clean dishtowel or cheese cloth. Place cooked squash in lined colander; squeeze out excess moisture and set squash aside. Sauté onion in butter for 5 minutes; remove from pan and mix all ingredients together except cracker crumbs. Pour in buttered casserole; top with cracker crumbs. Bake 25 to 30 minutes. Makes 8 servings.


Wednesday, November 17, 2010

Pumpkin-pecan pie is standout at "drive-by" Thanksgiving feast

We called it our "drive-by" Thanksgiving, but we would take a family Thanksgiving observance any way we could get it.

Earlier this week our son who lives in another state was in town overnight for a business meeting. Wish he'd been able to bring his wife and our two faraway grand preciouses with him, but since he couldn't, Hubby and I decided to round up any of our kiddos we could gather and have an official Thanksgiving feast. We decided it would have to do.

Turkey, dressing, cranberry sauce—the works—was served at this rushed-up event, but all was wonderful and tasty and memorable. Gave us a chance to play "find the real leaf"—a tradition that has been part of many past Thanksgiving dinners. Hubby went out into the yard and brought in a colorful bit of fall foliage. We interspersed it with the traditional artificial decor leaves that accompany our annual autumn centerpiece. As as been our custom for many years the kids (all adults, but who will always be our "kids") searched until they found the authentic one. Winner got to be the first person to be served dessert. (Believe me, with our daughter, son, and son-in-law as contestants, this gets dog-eat-dog competitive!)

How to pick out a menu for our "drive-by"—since I couldn't cook my entire Thanksgiving recipe file, I zeroed in on the things the kids like best. A traditional pecan pie was there, of course—prepared from my grandmother's recipe that's featured in my first cookbook, Way Back in the Country. To appease Hubby I knew I had to have pumpkin represented. That called for Pumpkin-Pecan Pie, featured in my new cookbook, Way Back in the Country Garden. It's a blending of the things he likes best. The lower strata of the pie is a pumpkin layer formed from fresh pureed pumpkin. After that bakes for about 25 minutes and starts to set, I pour on a pecan layer. From the surface the finished pie looks similar to pecan, but the pumpkin layer at the bottom forms a surprise. For pumpkin-pie lovers such as Hubby, it's a true Thanksgiving delight.

Adored son blitzed in and out of town; our dinner is history, but we have this unusual Thanksgiving memory to add to our collection. In addition, I've saved and frozen a slice of leftover Pumpkin-Pecan Pie, so Hubby can have his traditional "day-after" pie piece for breakfast on the morning of November 26.

Pumpkin-Pecan Pie

2 eggs (or 1/2 cup egg substitute)
1/4 cup sugar (or sugar substitute)
1/4 cup brown sugar (1/8 cup if using brown-sugar substitute)
1 teaspoon all-purpose flour
1 teaspoon pumpkin-pie spice
1/4 teaspoon salt (or salt substitute)
2/3 cup cooked pumpkin, mashed and drained
2/3 cup milk (I use skim milk)
1 (9-inch) unbaked deep-dish pastry shell

Pecan topping:
2 eggs (or 1/2 cup egg substitute)
1/2 cup dark corn syrup
2 tablespoons brown sugar (1 tablespoon brown-sugar substitute)
2 tablespoons molasses
1 tablespoon all-purpose flour
1 teaspoon vanilla extract
1/2 teaspoon salt (or salt substitute)
1/2 cup chopped pecans
1 cup pecan halves

In a mixing bowl beat eggs, sugars, flour, pie spice and salt until smooth. Mix in mashed and drained pumpkin. Gradually beat in milk. Pour into pastry shell. Bake at 425 degrees for 10 minutes. Reduce the oven temperature to 350 degrees and bake 15 minutes longer. For pecan topping beat eggs in a mixing bowl until eggs are foamy. Add corn syrup, brown sugar, molasses, flour, vanilla, and salt. Pour over filling. Sprinkle with chopped pecans; cover with pecan halves. Continue baking at 350 degrees for 30-35 minutes or until set. Cool completely. Store in the refrigerator. Makes 6-8 servings.


Tuesday, November 16, 2010

Can traditional green-bean casserole be supplanted as TG favorite? My "subcommittee" was open to sesame.

I was sure I was committing some sort of heresy. After all, doesn't everyone serve the traditional green-bean casserole (cream-of-mushroom soup, French-fried-onion topping, etc.) at Thanksgiving time? Would I dare deviate from the norm? Would a lightning bolt zap me in my kitchen?

Yet the cook who submitted Sesame Green Beans to the Family Circle magazine recipe collection vowed that her family members had been diehard green-bean haters before she tried Sesame Green Beans on them. Her blurb attached to the recipe indicated that her loved ones fairly beg for this vegetable now because of the new way of preparation. That moved Sesame Green Beans up to my must-try category. Traditional green-bean casserole got jettisoned for a new experiment (for now).

Unlike most recipes calling for fresh green beans, this one asked the cook to sauté the beans in olive oil rather than to steam or boil them. Garlic in the sauté process amped up the flavor. A brew of light soy sauce and water (sesame seeds added) tenderized the beans for about 10 minutes, with the skillet covered. Although the green of the beans darkened in the cooking process (one family member ultimately asked whether she was being served asparagus because of the darker color), it did nothing to detract from the end flavor result.

One night this week I tried Sesame Green Beans out on a "subcommittee" of the eventual end-recipients of Thanksgiving dinner. Would Thanksgiving magic be the same without my tried-and-true green-bean casserole?

All I know is that the bowl full of green beans disappeared quickly--not a single one remained for next day's leftovers!

Sesame Green Beans

2 tablespoons olive oil
1 teaspoon chopped garlic
1 1/2 pounds green beans, trimmed
3 tablespoons light soy sauce
1 teaspoon sesame seeds

Heat a large skillet over medium-high heat. Add oil and tilt pan to coat. Stir in garlic; cook 30 seconds. Add green beans and sauté, about 2 minutes. Pour in soy sauce along with 1/4 cup water. Sprinkle with sesame seeds. Reduce heat to medium and cover pan. Cook for 8 to 10 minutes, shaking pan occasionally. Uncover and stir beans to coat. Sprinkle a few more sesame seeds over the top. Serve warm. Makes 6 servings.


Monday, November 15, 2010

Late-season farm stand yields zucchini for delightful mini-muffins

Oh boy, oh boy, we found a roadside farm stand still open and still offering fall veggies! Sometimes this late in the year we end up disappointed when we go on a hunt for outdoor produce stands, but the one to which we were directed in rural Oklahoma (where we traveled for Hubby's physical exam that I mentioned last week) was well-stocked and ready for business.

I jumped for joy when I saw zucchini on the produce table. Now I could make my Carrot-Zucchini Mini-Muffins that always smell so autumn-y when they're in the oven. The recipe was from a Family Circle magazine of several years back. I love the fact that these muffins are bite-sized and taste wonderful by themselves or with some of my homemade peach preserves that I put up during the summer.

I've mentioned this before, but it's worth repeating about a simple solution to recipes calling for buttermilk: any recipe calling for buttermilk has an easy substitution. In this case put 3 teaspoons vinegar in a one-cup measuring cup; then fill the remainder of the cup with skim milk. Let this stand for five minutes. You can forget about having to purchase buttermilk which has a high fat content and then be stuck with the remainder sitting around in the refrigerator unused.

We enjoyed these as a little "extra" with our breakfast cereal in the mornings, but they also would be great as an "extra" (healthy) side dish with a Thanksgiving meal. Thank you, little Oklahoma roadside stand, for being available to us with this fresh produce just before closing-down time for winter. Makes us eager for spring when the whole cycle starts up again.

Carrot-Zucchini Mini-Muffins

1 cup whole wheat flour
1 cup all-purpose flour
1 tablespoon baking powder
1 teaspoon cinnamon
1/2 teaspoon baking soda
1/2 teaspoon salt (or salt substitute)
1 large egg (or 1/4 cup egg substitute)
1 cup buttermilk (or 3 teaspoons white vinegar mixed with the rest of the cup filled with
skim milk)
1/2 cup canola oil
1/2 cup packed light-brown sugar (or 1/4 cup brown-sugar substitute)
1 small zucchini, shredded (1 cup)
2 medium carrots, peeled and shredded (1 cup)
1/2 cup pecans
2 tablespoons chopped pecans for topping

Heat oven to 375 degrees. With nonstick cooking spray, coat just the bottoms of three mini-muffin pans. In a large bowl whisk together both flours, baking powder, cinnamon, baking soda, and salt. In medium-sized bowl, whisk egg, buttermilk, oil, and sugar until blended. Stir in zucchini, carrots, and nuts. Make a well in flour mixture; pour in egg mixture. Stir until dry ingredients are just moistened. Into each cup spoon a rounded tablespoon of batter. Sprinkle tops with chopped pecans. Bake at 375 degrees for 12 to 15 minutes until toothpick emerges clean. Cool pans on rack for 5 minutes. Remove muffins; cool on rack. Makes 36 mini muffins.

Friday, November 12, 2010

Flexing netted a great (substitute) broccoli/carrot/cheese soup recipe

Flexibility—that great byword that characterizes most missionaries and lots of other exemplary folk—is not in my constitution. As I've mentioned before, give me LOTS of warning before you switch gears on me. And when recipes are involved, if I've picked one to feature in my blog, I've picked it—as well as the date and the occasion for which I'll prepare it. It's set in stone!

So I was zooming along gathering ingredients for a broccoli-carrot-cheese soup recipe. The recipe of choice was satisfactory enough and had lain in my "untried" section for several years. I was tearing into the package of fresh broccoli crowns when I saw it printed on the back—the recipe of my dreams for creamy broccoli soup. It contained the broccoli, carrots, and onion that I had on hand already; what's more, it already had all the substitutions made for me—low-sodium chicken broth, skim milk, salt substitute—without my having to desperately hope that my "subs" would work out OK.

Well, this was a no-brainer. My old plans had to go to make room for Creamy Broccoli Soup, whose recipe appeared on the package. Thank you, Kroger, for featuring this healthy version on your brand of broccoli crowns.

The result was the soup of my dreams, plus I just had to toss in a little cheddar cheese to give that creamy sauce a cheese-y taste. See, I can flex and do so on my own! Hubby said it was his favorite broccoli soup ever. We kept dividing the leftovers in half and dividing them again to make it stretch for as long as possible.

And my old recipe? I've tossed it. Nothing like the healthy version that was dropped in my lap, just as I was about to prepare the former one. Must have been meant to be.

Creamy Broccoli Soup

4 cups broccoli florets
2 cups water
1/2 teaspoon onion powder
1 cup celery, chopped
1 cup carrots, chopped
1/2 cup yellow onion, chopped
6 tablespoons unsalted butter
6 tablespoons flour
3 cups chicken broth, low-sodium (may substitute vegetable broth)
2 cups skim milk
1 tablespoons fresh parsley, minced
1/2 teaspoon garlic powder
1 1/2 cups low-fat shredded cheese (optional)

In large pot bring water and onion powder to boil and add broccoli, celery, and carrots. Bring to a boil, drain, and set aside. Saute onions in butter until tender. Stir in flour to form a smooth paste Slowly add broth and milk. Stir constantly. Bring to a boil. Let boil for 1 minute; add vegetables and remaining ingredients. Reduce heat, cover, and simmer for 30 to 40 minutes until tender. Remove from heat. Add 1 1/2 cups low-fat shredded cheddar cheese, if desired. Stir until melted. Can be prepared 4 hours in advance. Makes 4 servings.


Thursday, November 11, 2010

Think you've tried everything pumpkin? Bet you've overlooked these pumpkin cookies.

Yesterday at a roadside fruit and vegetable market, the proprietor was extolling her delight in cooking with fresh pumpkin. She told me she had prepared every type of pumpkin recipe imaginable and knew of nothing "pumpkin" she hadn't cooked.

I asked her whether she had ever tried pumpkin cookies. She wagged her head "no". I hadn't either until I encountered this recipe. I told her that if she was a purveyor of fine things pumpkin, she must give these a whirl.

As with many other food items I've written about in The Newfangled Country Gardener, this recipe for Easy Pumpkin Cookies with Cream Cheese-Pecan Frosting had secured a place of honor in my fall recipe binder but had remained there, untried, for several years. Well, this was my year!

I loved everything about this recipe—especially the close-to-Thanksgivingy smell that invades the kitchen when these delectable little cookies are baking. I also love the tip that was provided at the end of the recipe (which appeared in my Kroger grocery circular some years back): the fact that you can substitute fresh pureed or canned pumpkin puree for half the oil in many brownie, muffin, and sweet-bread recipes.

Considering that at the outdoor market yesterday I brought home six mini pumpkins and one large one, I'll have pumpkin puree to substitute for oil in recipes for a very, very long time.

I plan to give a tray of these to a neighbor at Thanksgiving, take some to my kids on an upcoming visit, and put a few on my Thanksgiving table for our family. They are wonderful!

Easy Pumpkin Cookies

1 box spice cake mix
1 cup fresh pumpkin puree (or 1 cup canned pumpkin)
1 egg (or 1/4 cup egg substitute)
1/4 cup (1/2 stick) butter, melted
2 teaspoons pumpkin pie spice
1/2 cup chopped pecans

Cream-Cheese Frosting:
1 (8-ounce) package Neufchatel (cream-cheese substitute) cheese, softened
3 tablespoons butter, softened
1 1/2 cups powdered sugar
1/8 teaspoon salt (or salt substitute)
1 teaspoon vanilla extract
1/2 cup chopped pecans

Preheat oven to 350 degrees. In a medium bowl stir together all ingredients until well blended. Drop by the teaspoonfuls onto cookie sheets; press down cookie batter with a fork that has been dipped in sugar substitute. Bake for 10-12 minutes. Cool on rack. While they cool, make cream cheese frosting by beating cheese and butter at medium speed with an electric mixer until the mixture is creamy. Gradually add sugar and salt; beat until blended. Stir in vanilla. When cookies are cool, frost with Cream Cheese-Pecan Frosting. Sprinkle on chopped pecans. Makes 3 dozen cookies.


Wednesday, November 10, 2010

Heard of a birthday cake? Try a birthday crumble.

Birthday cakes were on the no-no list. My hubby was headed for his annual physical exam. We had to be pristine pure with our eating agenda until his bloodwork was finished. Only trouble was, his physical exam coincided with my birthday. No birthday cake for me while we worked toward his goal of lowered triglycerides and lowered cholesterol.

But nobody said we couldn't have a Birthday Crumble. A great recipe for Cranberry-Apple Bake was on my fall wish-list. I couldn't imagine a more divine, healthy combination than cranberries and apples. This recipe, which I tore out of a Family Circle magazine a few years back, was touted by its originator as a favorite when she took it to church potluck dinners. "I always return with an empty dish," this cook wrote in the commentary beside her recipe. "My family likes to eat it warm, but I am not above eating some straight from the refrigerator for breakfast." Well, bring some of that on! I can continue to enjoy Birthday Crumble the day after my birthday and even the day after that.

May I digress to say how thankful I am for another year of life and for the year that is just behind me? The year that just past brought the arrival of two beautiful baby grandsons (as well as continued enjoyment of our grandgirl), the publication of two new books, and the creation of a sewing/crafts studio as an amazing addition to my home. I'm more in love with my husband than ever; I'm so thankful for Hubby and that God gave him to me all those years ago (even if I have to forego cake on my birthday because of him!) Even beyond those blessings, the year just past has been one of improved physical health and overall wellness and an increased awareness of God's love for me and His everpresent help in times of trouble. I can't count all the times between birthdays #61 and #62 that God has shown up. He continues to demonstrate to me how He likes to interpose Himself in clever ways into situations that look as though they have no solutions—His creativity knows no bounds. As the psalmist wrote, His praise will always be on my lips (Ps. 34:1).

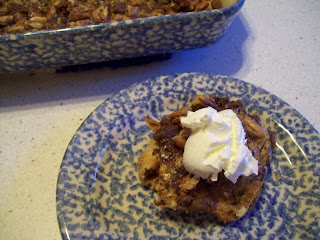
The Birthday Crumble? That scrumptious topping of oats, brown sugar, flour, and chopped pecans, laced together with melted butter, plunked atop the apple and cranberry mixture, beat any sicky-sweet cake I could have bought or made. It was health personified—a terrific way to kick off year 62!

Cranberry-Apple Bake

3 Granny Smith apples, cored, unpeeled, and cut into 1-inch pieces (about 4 cups)
2 cups whole fresh cranberries
2/3 cup sugar (or sugar substitute)
1 1/2 cups old-fashioned oats (not quick-cook)
1/2 cup packed light-brown sugar (if using brown-sugar substitute, use 1/4 cup)
1/3 cup all-purpose flour
1/2 cup chopped pecans
1/2 cup (1 stick) unsalted butter, melted

Heat oven to 350 degrees. Grease a 2-quart baking dish. In a large bowl mix together the apples (unpeeled), cranberries, and sugar. Spoon into prepared baking dish. In the same bowl mix together the oats, brown sugar, flour, and pecans. Stir in the melted butter. Sprinkle the oatmeal mixture evenly over the top of the apples. Bake at 350 degrees for 45 minutes until bubbly and apples are tender. Serve warm or cold with a scoop of ice cream or fat-free whipped topping, if desired.

Tuesday, November 9, 2010

Pecans aplenty (and overripe bananas as well) call for a spectacular dessert

One thing we always have plenty of is pecans. I see big bags of them for sale (at big prices) in the grocery store and realize how fortunate our home is to be surrounded by pecan trees so we never have to purchase any of these cherished nuts. If we ever had a pecan shortage at our house, my mother's home, which still is in the family although my mother is deceased, has at least half a dozen pecan trees just down the block from us. This year looks like a lean one pecan-wise, but not to worry: the freezer is stocked with bucketloads from last year's huge harvest to last us until the next big pecan deluge. (My dad used to say that pecans arrive in tandem: one year plentiful one year lean, the next year plentiful, followed by the next year lean; whether that is scientific I don't know, but his observations over nearly nine decades certainly bore out his beliefs.)

His pecan trees were my daddy's pride-and-joy. He loved picking the nuts off the ground, cracking them with his thumb, and eating the sweet nut meat right there on the spot. I must say that we especially share this sense of pride as we tend our prized paper-shell pecan tree, with nuts so sweet, they're a dessert in themselves. The paper-shell is a mixed blessing. Situated right up next to the house, the tree has droppings that cause my eyes to itch and my contact lenses to become unwearable for a time, but the rewards are great when the sweet paper-shell nuts are harvested.

A dessert we've been enjoying all week showcases those splendid pecans while it uses up some about-to-be-overripe bananas and some wheat bread slices that were nearing the end of the line. Banana-Pecan Streusel Bread Pudding, which I first saw as a recipe from the Better Homes & Gardens website, looks sinful but is made with the healthiest of ingredients. Topped with sugar-free whipped topping (ice cream is recommended, but no ice cream for us, since Hubby's six-month physical is right around the corner), Banana-Pecan Streusel Bread Pudding not only is a wonderful dessert but also makes a great (and guilt-free) breakfast dish.

Banana-Pecan Streusel Bread Pudding

1 (12-ounce) can fat-free evaporated milk
1 1/3 cups mashed ripe banana (about 4 medium)
3 beaten eggs (3/4 cup egg substitute)
1/2 cup sugar (or sugar substitute)
1 tablespoon vanilla
1 teaspoon ground cinnamon
1/2 teaspoon almond extract
3 cups torn bread cubes (from whole-wheat bread that's at least a day old)
1/4 cup packed brown sugar (if using brown-sugar substitute, use 1/8 cup)
2 tablespoons all-purpose flour
1 tablespoon margarine or butter, melted
1 teaspoon ground cinnamon
1/2 cup chopped pecans
sugar-free whipped topping (or ice cream)

Lightly grease a 2-quart rectangular baking dish; set aside. Stir together evaporated milk, banana, eggs, granulated sugar, vanilla, 1 teaspoon cinnamon, and the almond extract. Place croissant pieces in prepared baking dish. Pour egg mixture evenly over torn bread pieces; press pieces down to be sure they are all moistened. In a small bowl combine brown sugar, flour, melted butter, and 1 teaspoon cinnamon. Stir in pecans. Sprinkle over bread mixture. Bake in a 350-degree oven for 40 to 45 minutes or until a knife inserted near center comes out clean. Let stand for 30 minutes. Serve warm. If desired, top with whipped topping or ice cream. Makes 10 to 12 servings.


Sunday, November 7, 2010

Maturing of the taste buds paved the way for enjoying Chicken Pot Pie

Never too late for the taste buds to mature, I say. In my childhood, youth, young- and even middle-adulthood, the idea of Chicken Pot Pie sounded like the idea of eating dirt. I couldn't imagine throwing veggies, chicken, and a sauce together and topping it with a biscuit. The dish was one of Hubby's favorites; a few random times in our marriage I grudgingly made it for him, but I'd pop some fish sticks into the oven on the side so I wouldn't have to eat Chicken Pot Pie myself at the upcoming meal. Putting things mildly, to me Chicken Pot Pie was gross.

I remember the day things changed for the better. The occasion was Hubby's birthday a few years back; I wanted to make him a special dinner but didn't have time to race to the grocery. I had to use ingredients I had on hand. A recipe for Chicken Pot Pie rose to the surface. Of necessity I prepared it. For reasons I can't explain, suddenly I saw this dish in a different light. It looked healthy and soothing every bit like the comfort food it was. That night I didn't fix my side entree so I could sneak myself option; I served myself Chicken Pot Pie. Delicious! Why had I been depriving myself of this great dish?

The rest is history. Not long ago the Chickasaw Nation Nutrition Services, one of my greatest sources of recipes, provided the following recipe that brims with fresh veggies. If Hubby liked Chicken Pot Pie, he'd adore one prepared from a recipe card provided by "his people" (remember that Hubby is a citizen and elder of the Chickasaw Nation). This time it's my upcoming birthday, and not Hubby's, we're celebrating, but I can't think of a better birthday meal to get ready for myself. I'm thankful for the maturing of the taste buds that broadened my horizons to include this wonderful food.

Chicken Pot Pie

2 cups low-fat bakery mix (tried with low-fat Bisquick)
1/2 cup fat-free milk
1/4 cup fat-free egg product
2 (10 3/4-ounce) cans reduced sodium cream of chicken soup
1 cup fat-free milk
3 cups cooked chicken, shredded
2 cups fresh cooked mixed vegetables (corn, okra, green beans, green peas, etc., whatever you have on hand)
1/4 teaspoon celery seed
1/4 teaspoon paprika

Preheat the oven to 400 degrees. In a medium bowl stir bakery mix, eggs, and 1/2 cup milk to make biscuit topping. Set aside. In saucepan on medium-high heat combine cream of chicken soup, 1 cup fat-free milk, chicken, mixed cooked vegetables, and seasonings. Stir until mixture is heated through. In a casserole dish add chicken mixture. Spoon biscuit dough over chicken mixture. Bake uncovered for 25 minutes until topping is golden brown. Makes 10 servings.


Friday, November 5, 2010

Brunswick Stew recipe carries me home to "old Virginny"

The grass is always greener. A few days ago I rhapsodized about a taste of home—King Ranch Chicken—which sustained my homesickness for Texas when I lived far away. Today's recipe scratches just the opposite itch--a longing for Virginia, the gorgeous state that was our residence for six years before we moved back to Texas to stay in the year 2000.

That longing calls out to me especially during this time of year, since we spent many a Thanksgiving Day walking up and down the autumn-leaf-strewn streets of Colonial Williamsburg, which in my estimation is one of the best places on the globe to enjoy traditional turkey dinner. Only one hour away from our front door when we lived in Richmond, Colonial Williamsburg was our "therapy spot"—an amazing, closeby getaway that some people travel from from farflung cities to experience.

My taste of All Things Virginia occurs in the form of Brunswick Stew, a typical Virginia dish. Competing claims exist about whether this recipe actually originated in Virginia or Georgia, but most versions are tomato-based and contain chicken and/or pork and various types of vegetables including lima beans, corn, and okra.

In my fall recipe files is a Brunswick Stew recipe from the Better Homes and Gardens website. It was ideal because it was a slow-cooker version and enabled me to use the very last of the okra brought in before the last of our garden's okra plants were felled about a week ago. One big ladleful of this steaming stew and I'm transported back to old Thomas Jefferson's hangout in a city where, for the visitor, time stands still. Thank you, CW, for the Thanksgiving memories!

Brunswick Stew

3 medium onions, cut into thin wedges
2 pounds meaty chicken pieces, skinned
1 1/2 cups diced cooked ham (8 ounces)
1 (14 1.2-ounce can diced tomatoes), or 2 cups fresh tomatoes, diced
1 (14-ounce) can low-sodium chicken broth
4 cloves garlic, minced
1 tablespoon Worcestershire sauce
1 teaspoon dried thyme, crushed
1/4 teaspoon pepper
1/4 teaspoon bottled hot pepper sauce
2 cups sliced fresh okra
1 cup fresh or frozen baby lima beans
1 cup fresh or frozen whole-kernel corn

In a 3 1/2- to 4-quart slow cooker place onion. Top with chicken and ham. In a small bowl combine the undrained tomatoes, broth, garlic, Worcestershire sauce, mustard, thyme, pepper, and hot pepper sauce; pour over chicken and ham. Cover and cook on low-heat setting for 8 to 10 hours or on high-heat setting for 4 to 5 hours. Remove meat from chicken bones; cut meat into bite-sized pieces. Return chicken to slow cooker; discard bones. Add okra, lima beans, and corn to crockery cooker. If using low-heat setting, turn to high-heat setting. Cover and cook 45 minutes or more until vegetables are tender. Makes 6-8 servings.


Thursday, November 4, 2010

God and green peppers--some things never change

Gardens come; gardens go. Some of ours are abundant; some are bleak. Some have given us such a plethora of pumpkins, we practically have to dump our overage out on the street corner for passersby to help themselves; some are grand disappointments, especially when I was counting on a big beet crop to make Aunt Bonnie's beet pickles. At some point we've had luck with just about every vegetable, yet the following year we'd have to get out our magnifying glass to find even one tomato on our tomato vine.

But one thing about our garden never changes--green peppers. They're always there; they're never-fail garden yield. (That one'll preach, won't it? What does Lamentations 3:22-23 say: "His compassions never fail. They are new every morning; great is your faithfulness"?) Yup, God and green peppers; you can always count on both of them to be just the same, year after year, regardless where we have lived and grown a garden.

Not only that, but our peppers keep producing until the last dog is dead, as it were. Right up until the first freeze--and sometimes even afterward--they're out there just blooming their faithful heads off. Just about the time we think we're ready to hack down the vines to winterize the garden, out crops another flurry of green peppers to bring in. They're indefatigable--always sending me back to the drawing board--scraping through my recipe files for yet another suggested way to use them up.

I'm not scraping yet. Apple Dressing-Stuffed Peppers, written on a gold recipe card with its source not noted so I don't know who to thank for this idea that was like gold to me, was waiting in the wings for another green-pepper haul. I'm thankful it was. Hubby kept remarking, "This doesn't have any meat in it. This doesn't have any meat in it." He wasn't unhappy; he was just marveling at how good and substantial a stuffed-green-pepper recipe could be without the usual addition of ground beef or ground turkey.

Green peppers and pecans, always two things we have plenty of on our property, are combined with apples, apple juice, and chopped celery and topped with Parmesan. Though I love them, I usually regard stuffed green peppers as a laborious enterprise, but this version was surprisingly quick and made an ample amount. One round was served up for our dinner, a second round went into the deepfreeze to pop out for those Desperation December Dinners about which I've already blogged.

Who'd like to bet that in deepest December, when we dig into that welcome, set-aside Apple Dressing-Stuffed Peppers batch, we can still spot some green peppers trying to push their way through in our otherwise spent garden? O, to be like them in the "winter" of my life. (That one'll preach, too!)

Apple Dressing-Stuffed Peppers

5 medium green peppers, cored and seeds removed
2 cups apples, diced
1 cup stuffing mix (tried with Kroger-brand cornbread stuffing mix)
1/4 cup apple juice
1/4 cup chopped celery
1 egg, beaten
1/3 cup Parmesan cheese

Cook green peppers in boiling water about 5 minutes. Remove boiled peppers to a paper towel and drain upside-down. Mix remaining ingredients. Spoon into drained green peppers; stand peppers upright in a greased baking dish. Sprinkle tops with Parmesan cheese. Bake at 350 degrees for 35 to 40 minutes. Serves 5.


Wednesday, November 3, 2010

Jettison the strawberries and still have a wonderful apple salsa dish with cinnamon chips

If my hubby gets within the same room as a strawberry, we pay for it for days on end.

At some point in his adult life he developed a terrible reaction to strawberry seeds--not raspberry or even tomato seeds, mind you--but strawberry seeds. They give him violent, doubled-over stomach cramps, as the berry seeds wedge their way into various nooks and crannies (doctors call these diverticulii) of the digestive tract. Pain and misery ensue for the next 48 hours and beyond.

No, no, no, he says to any thought of strawberries anywhere near his food. (Our granddaughter likes to tease him by calling him "Mr. Strawberry Man" and bringing around plastic strawberries from her play food to "tempt" him.) That means delicacies of the summer such as strawberry shortcake and strawberry homemade ice cream are off-limits. If I'm at a party at which strawberries appear on a fruit tray, I'll quietly take one onto my plate and sneak off into some corner to get my strawberry fix, but rarely do I bring them home from the grocery. Can't run the risk that a stray seed might crosspollinate in the fridge.

So when I was lured by the recipe for Apple Salsa with Cinnamon Chips to use some of those gorgeous fall apples in my refrigerator, I had to stop short when I saw that a cup of chopped strawberries was among the ingredients. Bummer, I thought, that sounded good. Then I reneged and decided to make two versions--a non-strawberry one for Hubby and the recommended version for me (and for the photo to go with this blog). This worked well, although I stored each version in absolutely airtight, separate containers so a random seed wouldn't migrate over to the non-strawberry bowl.

This is a simple, wonderful dish (source: Chickasaw Nation Nutrition Services) that is enhanced by the inventive cinnamon chips, made from your average wheat tortilla. When we ate up all the chips in using it for an appetizer/snack, the leftover salsa transitioned to a fruity side dish with an entree. We also envisioned it as a topping for ice cream. Mr. Strawberry Man was happy and I was beyond so, since I wasn't left to wonder the outcome of this intriguing recipe.

Apple Salsa with Cinnamon Chips

Salsa:
2 medium tart apples, chopped
1 cup chopped strawberries
2 medium kiwifruit, peeled and chopped
1 small orange
2 tablespoons brown sugar (I subbed with 1 tablespoon brown-sugar substitute)
2 tablespoons sugar-free apple jelly, melted

Chips:
8 whole wheat tortillas
1 tablespoon water
1/4 cup sugar (I used sugar substitute)
2 teaspoons cinnamon

In a bowl combine apples, strawberries, and kiwi. Grate zest from entire orange. Squeeze juice from orange. Add zest and juice to apple mixture (don't add orange itself). Stir in brown sugar and jelly. For the chips, cut each tortilla into 8 wedges. Use a pastry brush to brush tortilla wedges lightly with water. Combine sugar and cinnamon; sprinkle over tortillas. Place in a single layer on ungreased baking sheet. Bake at 400 degrees for 6-8 minutes or until lightly browned. Cool and serve with salsa. Makes 8 servings.


Tuesday, November 2, 2010

King Ranch Chicken's origins may be disputed, but no one debates the flavor of this healthy, comforting dish

For 12 long years it was one of my treasured connections to the Lone Star State. During that dozen years of Eastward wandering, Hubby and I were privileged to live in two of the beauty spots of the U.S.--Nashville, TN, and Richmond, VA. We loved soaking up all that was a part of those two interesting cities, but the Green Grass of Home always beckoned. When those longings became palpable, I'd brew me up some King Ranch Chicken.

The origin of King Ranch Chicken is somewhat debatable, but no one disputes that this dish, named for the epic South Texas ranch that covers a gargantuan territory, is Texana at its finest. King Ranch Chicken is a soft, slightly spicy, cheesy mixture of tomatoes, tortillas, chicken, creamy sauce, and green peppers. It's the ultimate comfort food--especially when the comfort needed involves a taste of home.

The recipe I used during the years of our Eastward progression was from a First Place recipe book--First Place being the Christ-centered health program whose materials I was privileged to help launch when I worked in Nashville. This recipe collection was the first I encountered to start subbing healthy ingredients for this casserole that's synonymous with All Things Texan.

My October 2010 issue of Southern Living magazine featured King Ranch Chicken in a collection of simple slow-cooker recipes. I had never seen a slow-cooker adaptation for King Ranch Chicken, so I was eager to try to take it on, especially since it called for a generous portion of my garden-fresh green peppers that I knew would help spice it up.

In the year 2000 a gracious God allowed us to return to Texas for good. I believe I heard the bells of heaven ring out the day our four vanloads of belongings crossed that state line and we were able to settle back among our roots. I no longer need to cook King Ranch Chicken to ground me in Texana, but I still bask in that great flavor. This slow-cooker recipe bubbled in the crockpot overnight and with my garden's own green peppers added was a welcome reward the next morning so I could say "got-it-done" for that day's meal.

King Ranch Chicken

4 cups chopped cooked chicken
1 large onion, chopped
1 large green bell pepper, chopped
1 (10 3/4-ounce) can cream of chicken soup, low-sodium variety
1 (10 3/4-ounce) can cream of mushroom soup, low sodium variety
1 (10-ounce) can diced tomatoes and green chilies
1 garlic clove, minced
1 teaspoon chili powder
12 9-inch) fajita-sized tortillas
2 cups (8 ounces) shredded Cheddar cheese (I use cheese from 2-percent milk)

Stir together first 8 ingredients. Tear tortillas into 1-inch pieces; layer one-third of tortilla pieces in a lightly greased 6-quart slow cooker. Top with one-third of the chicken mixture and 2/3 cup cheese. Repeat layers twice. Cover and cook on low 3 1/2 hours or until bubbly and edges are golden brown. (I cooked mine overnight on low with no problem.) Uncover and cook on low 30 minutes. Makes 12 servings.


Monday, November 1, 2010

Pumpkin recipe yields healthy, delicious surprise

Last night his parents brought our little 8-week-old munchkin over for trick-or-treat. Of course that cute baby had plenty of treats to fill his pumpkin (mainly Halloween books that his mommy could read to him and a crisp $5 bill like his great-grandmother Moore years ago always gave her grandpersons when they were young).

But what about the parents who cheerfully toted him all over town in his pea-in-the-pod costume to see admiring grandparents? Didn't that mom and dad deserve a treat also?

Aha, pumpkin recipe time! An untried-from-last-year treasure called out to me, as did some more fresh pureed pumpkin that awaited in my refrigerator. And since Halloween is the season of surprises, what better recipe to try than one for Pumpkin Surprise Loaf, which I first dined on last year at a church gathering? The person who baked it then dispensed the recipe because of popular acclaim.

The surprise is a delightful center of softened cream cheese, sugar, and egg white (using healthy substitutions, of course) surrounded by a top and bottom layer of pumpkin bread.

So when, amid multiple camera flashes, the proud mom and dad delivered their pea-in-the-pod for our viewing, they found a treat tray waiting for them as well--with slices of Pumpkin Surprise Loaf to sustain them for the remainder of the evening while their little one made his Halloween debut.

The loaf--as well as the munchkin--were big hits.


Pumpkin Surprise Loaf

1 cup mashed, pureed pumpkin (or 1 cup canned pumpkin)
1 cup plus 2 tablespoons granulated sugar, divided (I used sugar substitute)
1/2 cup firmly packed brown sugar (I used brown-sugar substitute--only 1/4 cup needed)
4 egg whites, divided
1/2 cup fat-free milk
1/4 cup canola oil
2 cups all-purpose flour
2 1/2 teaspoon baking powder
2 teaspoons pumpkin-pie spice
1/4 teaspoon salt
1 (8-ounce package) cream cheese, softened (I substituted with Neufchatel)

Preheat oven to 350 degrees. Grease a nonstick 9-inch-by-5-inch loaf pan; set aside. In a large bowl mix pumpkin, 1 cup sugar, the brown sugar, 3 of the egg whites, milk, and oil. Add flour, baking powder, pie spice, and salt; stir just until moistened. Set aside. With wire whisk beat cream cheese, remaining 2 tablespoons granulated sugar, and the remaining egg white until mixture is well-blemded. Spoon half of the pumpkin batter into prepared pan; spoon cream cheese mixture evenly over batter. Cover with remaining pumpkin batter. Bake 1 hour or 1 hour 5 minutes or until wooden toothpick inserted in center emerges clean. Run knife or thin spatula around edges of pan to loosen bread; cool in pan on wire rack for 10 minutes. Remove bread from pan to wire rack; cool completely. Makes 1 loaf or 16 servings, 1 slice each.